From sign-up to first order: a hands-on walkthrough of the Clawdot developer console
The Clawdot console is your self-service backend for managing API access. This guide walks you from creating an account through creating an Agent, obtaining an API Key, binding end users, and on to managing dedicated channels and upgrading your plan.The console has four sections in the left sidebar:
Section
Purpose
Dashboard
View today’s quota usage and the last 7 days of call history
Agents
Create/manage Agents, API Keys, and bind end users
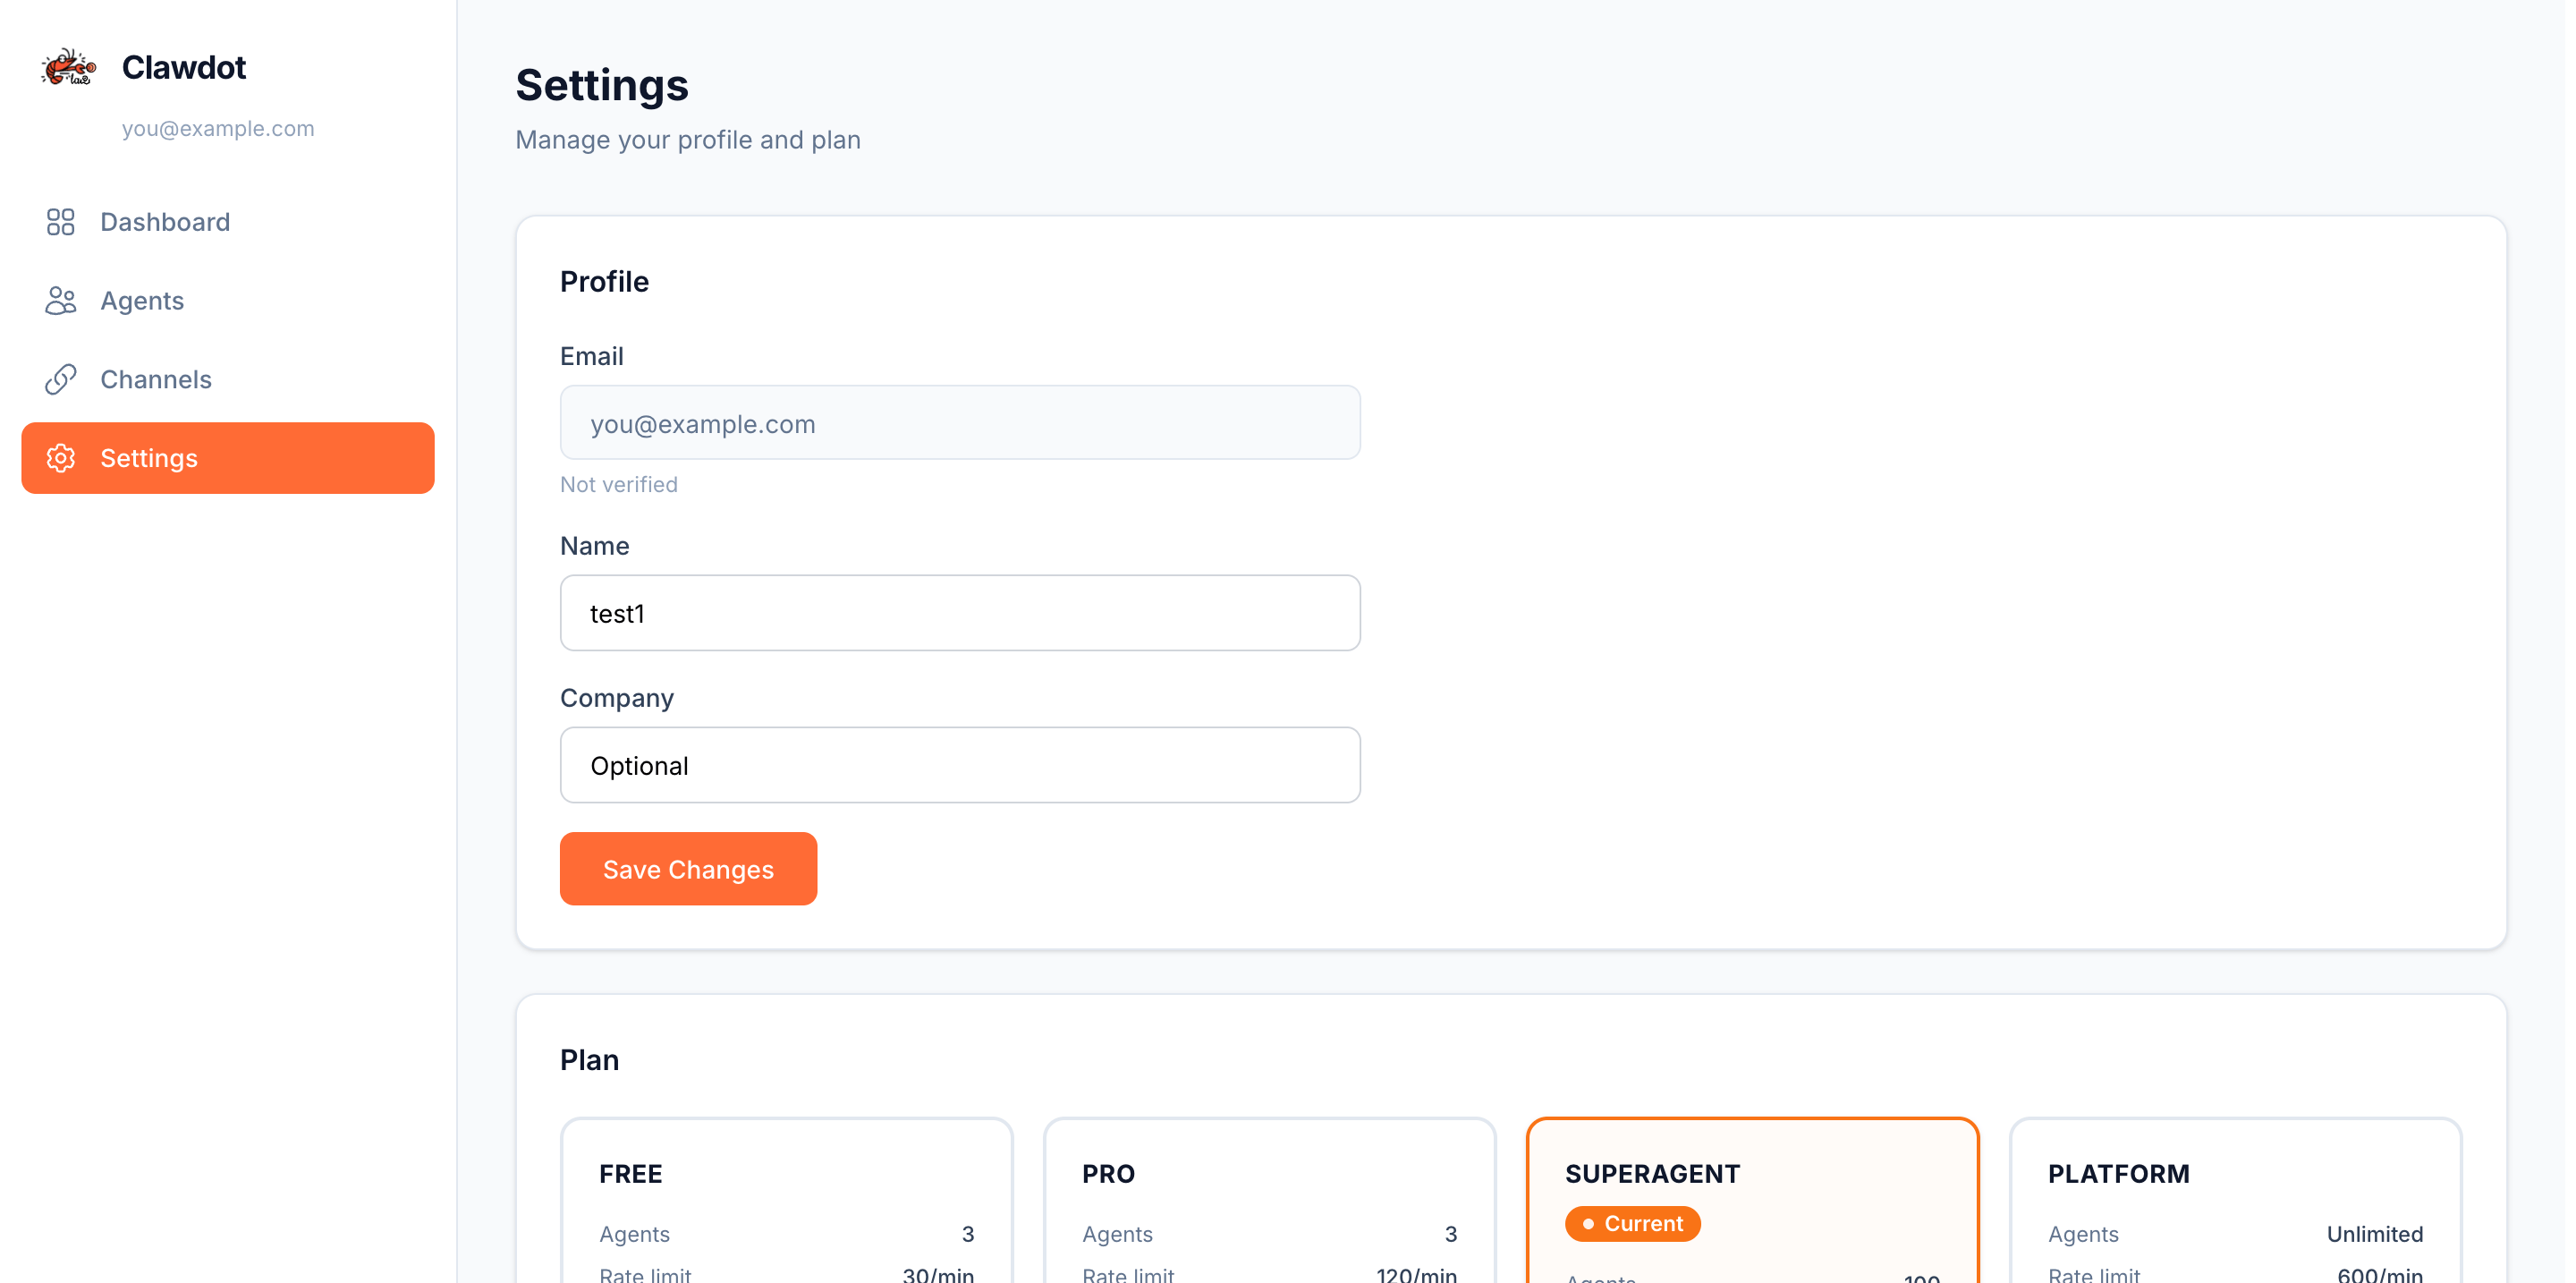
Edit your profile, view your plan, request upgrades
The console home page after login, with the four sections in the left sidebar
The console UI is partly in Chinese (the Channels page and upgrade dialog). This guide keeps the original Chinese labels followed by an English gloss so you can match them on screen.
Open the console URL and register one of two ways:
One-click with Google: Click Continue with Google and authorize with your Google account — no password needed.
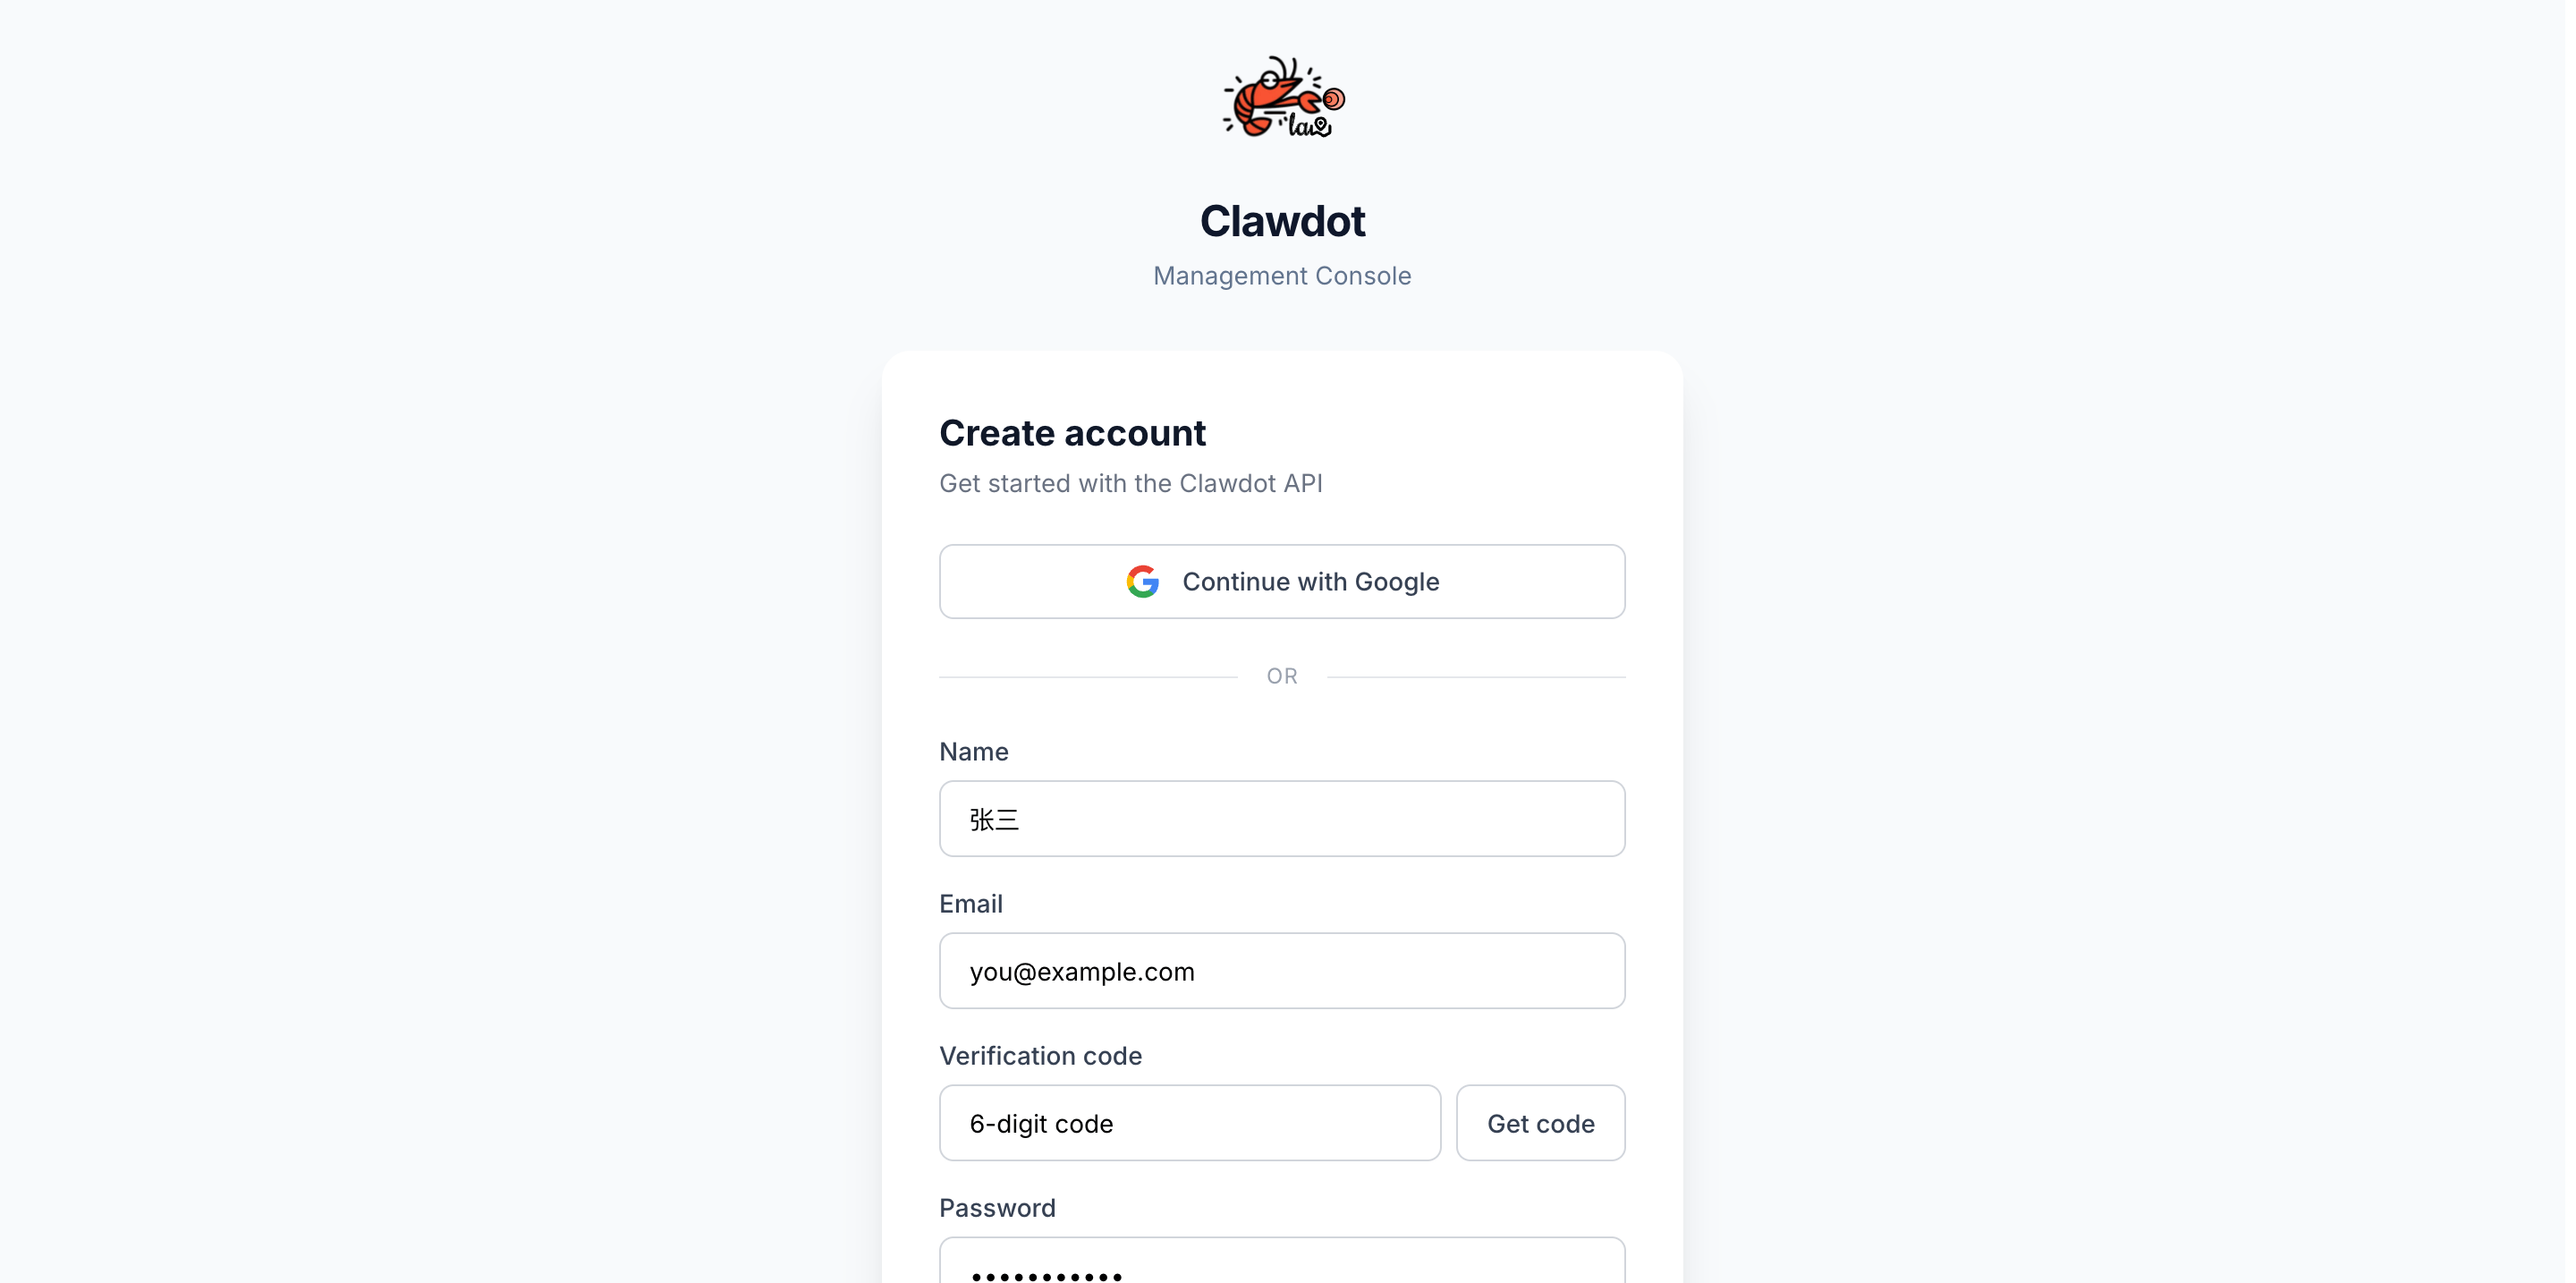
Email: Fill in Name and Email, click Get code to receive an email verification code (resendable once every 60s), then enter the code, set a password (6+ chars), and click Create account.
Email sign-up form: click Get code after filling in your details
After sign-up, the page shows your auto-created API Key — click Copy to Clipboard to save it. Even if you don’t, no problem: you can later find the Agent on the Agents page and copy the full API Key anytime from the copy button next to its key prefix.
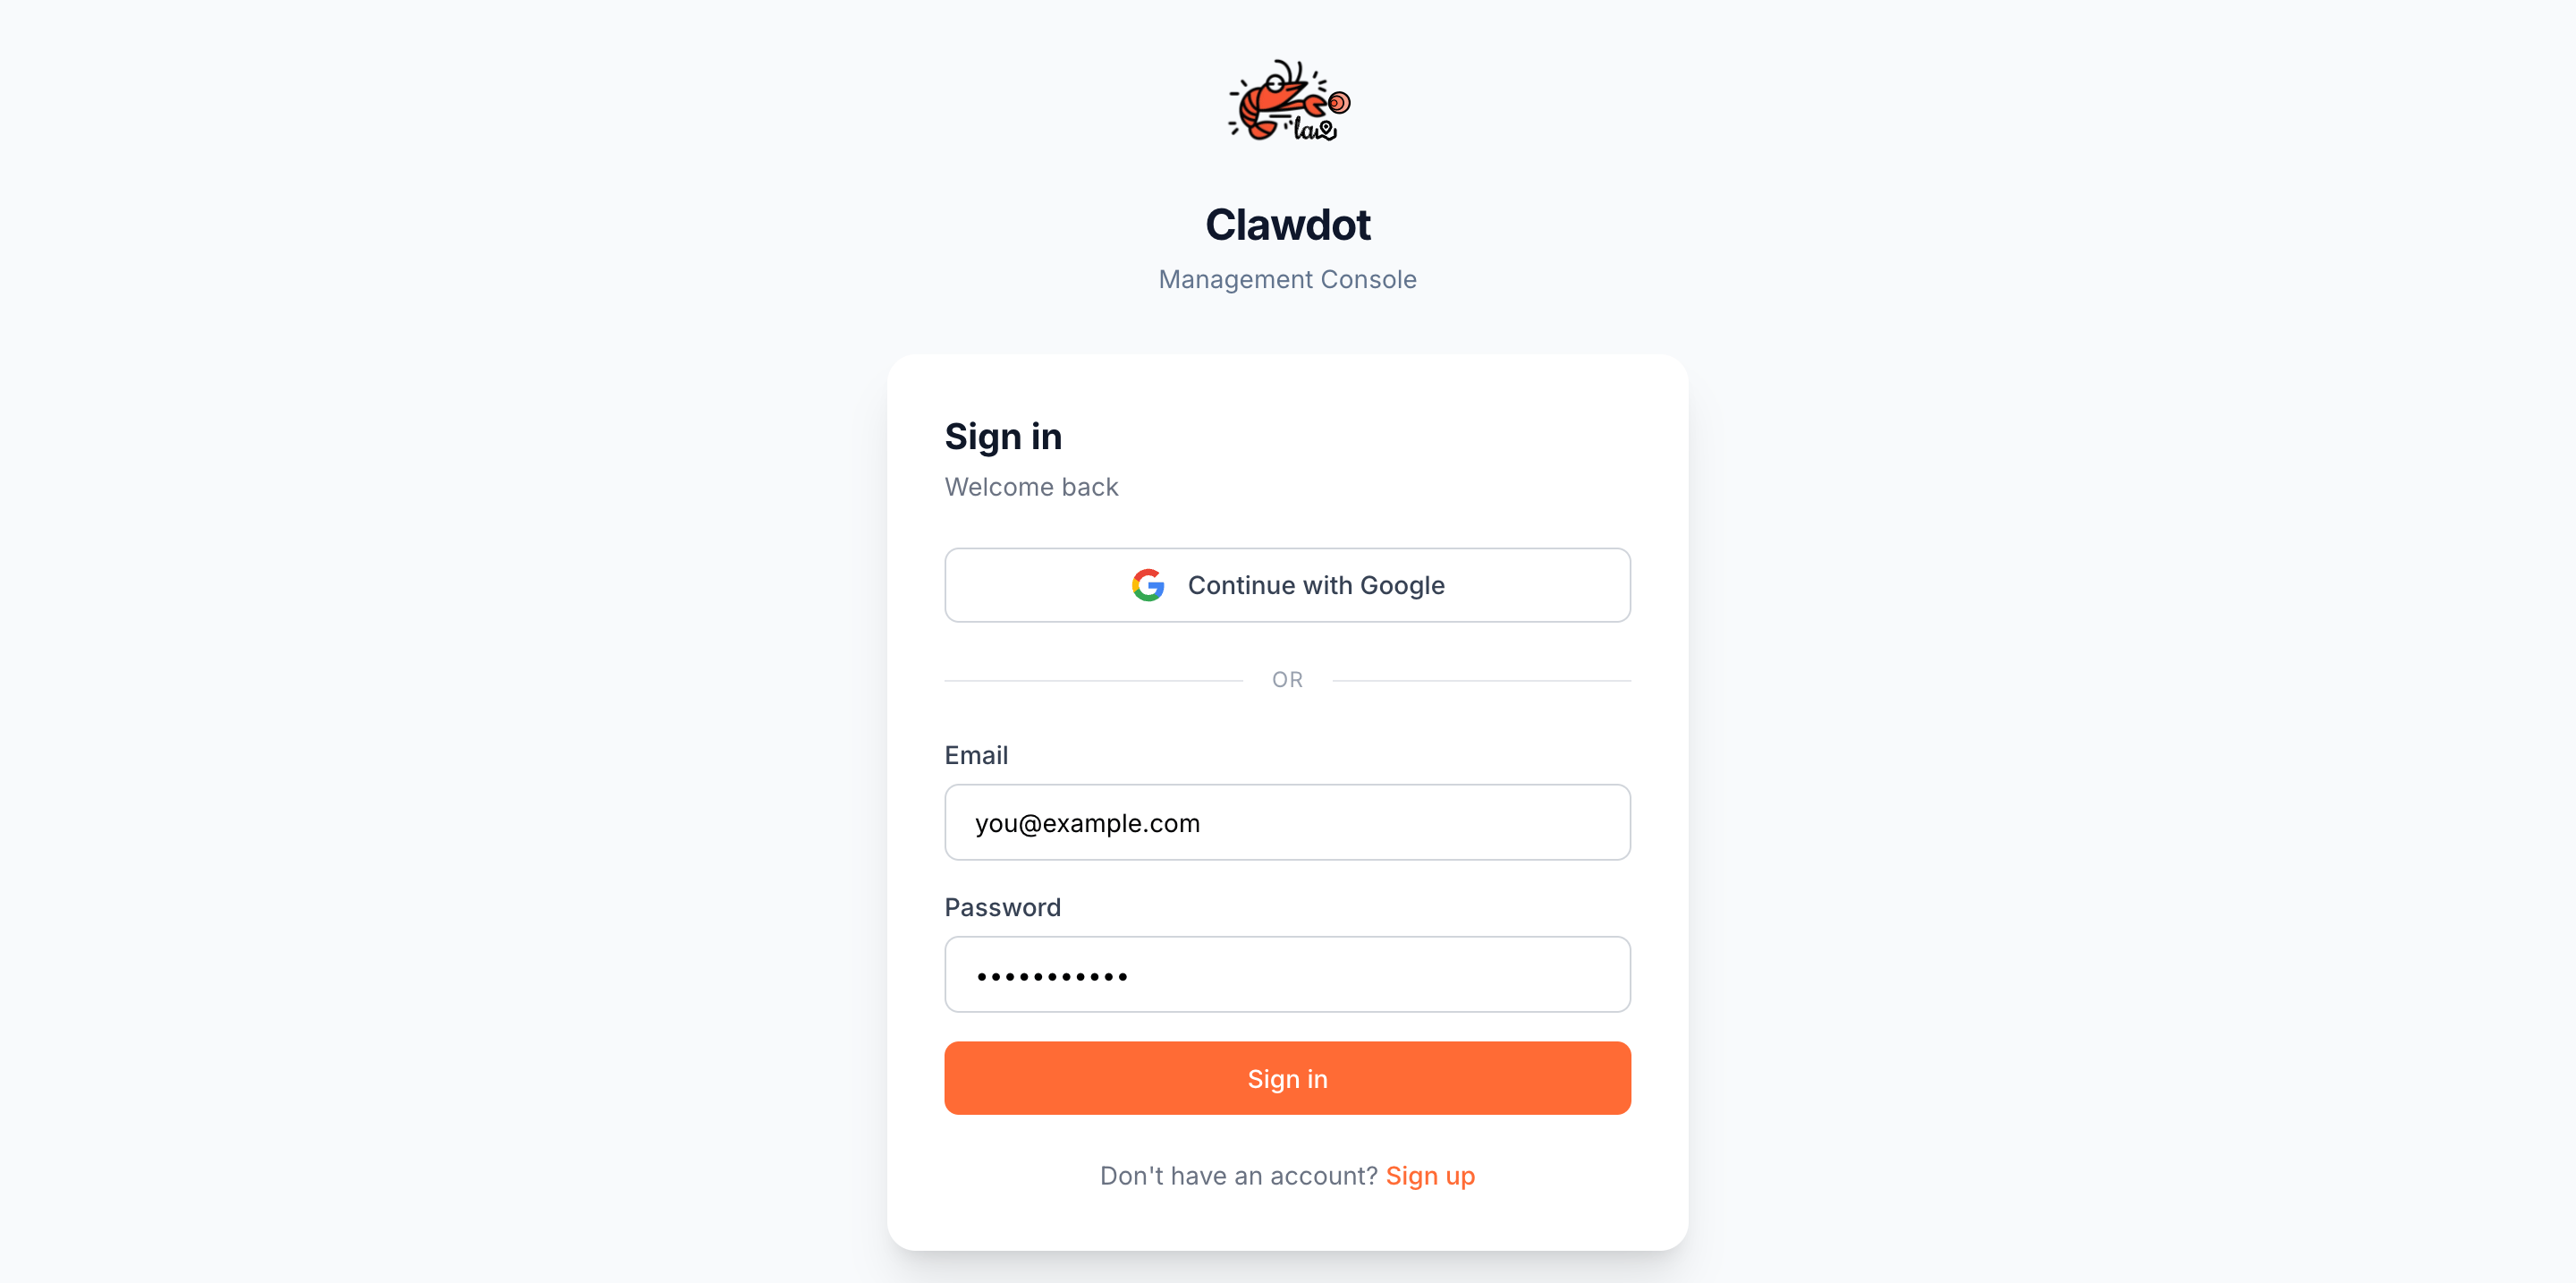
If you already have an account, sign in with Google or email + password.
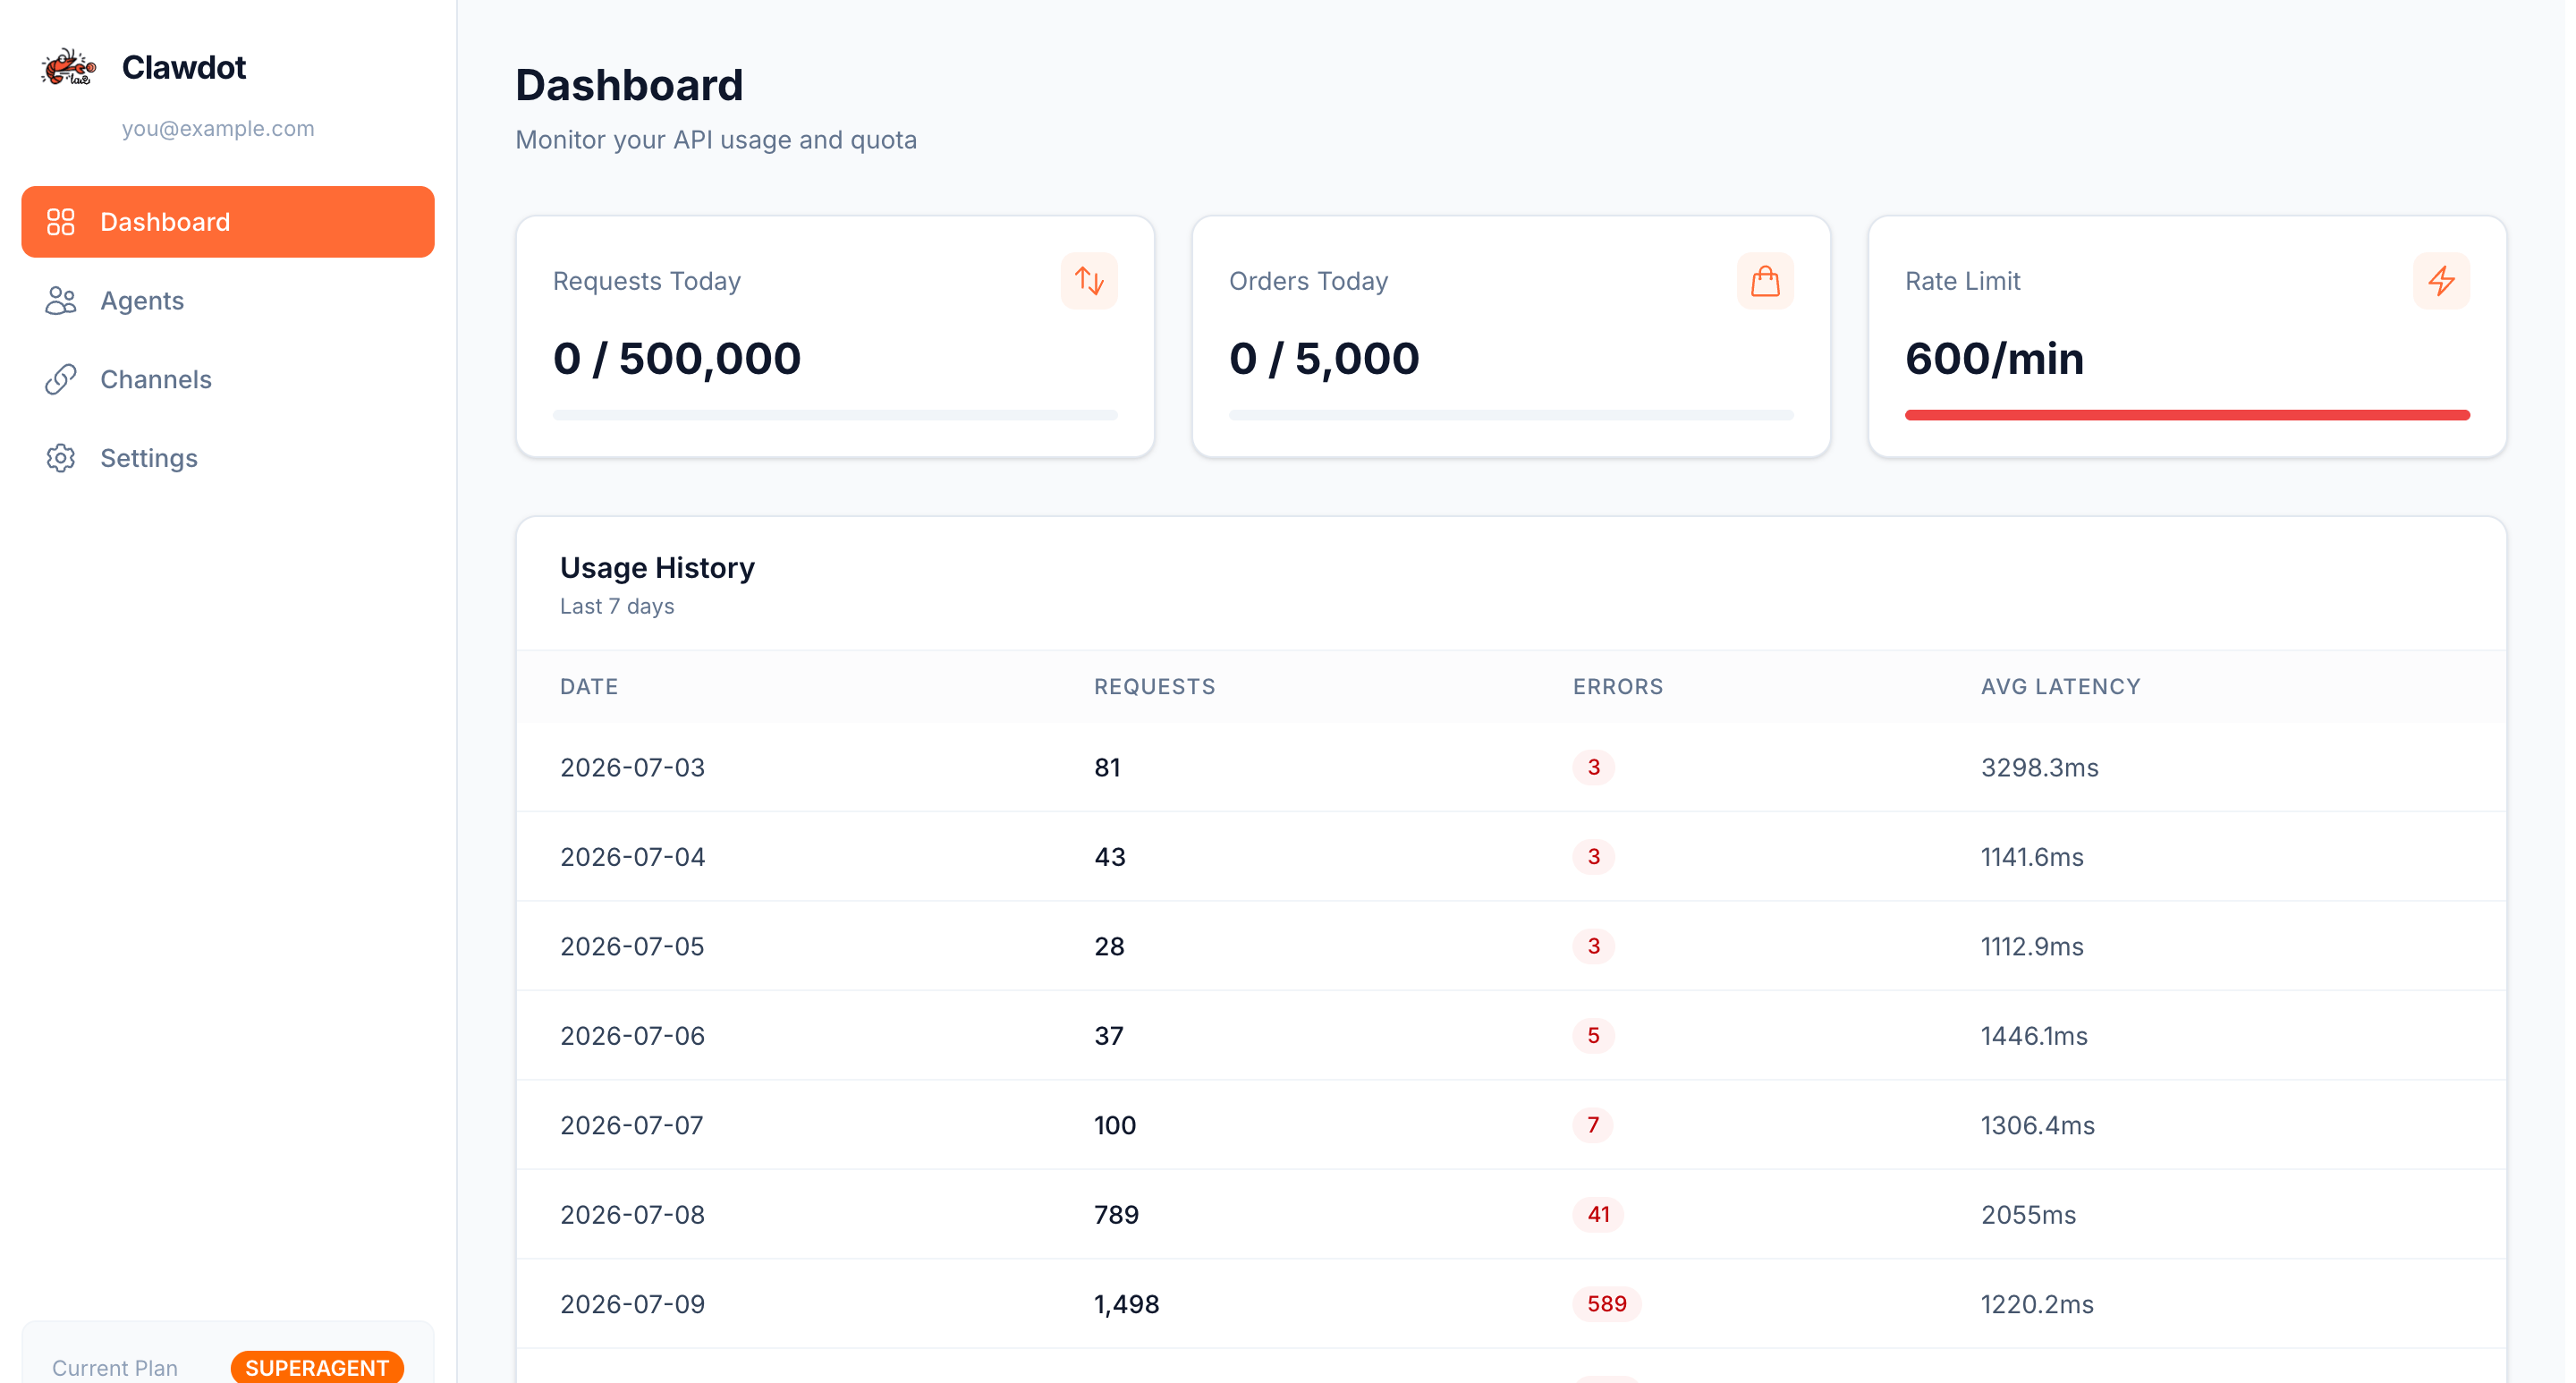
The console opens on the Dashboard, where you track call volume and health:
Requests Today: today’s used requests / daily request limit
Orders Today: today’s placed orders / daily order limit
Rate Limit: your plan’s per-minute rate limit
Usage History: daily requests, errors, and average latency over the last 7 days
The progress bar under each card changes color with usage — yellow past 50%, red past 80%. As you approach a limit, request an upgrade in Settings ahead of time to avoid being throttled.Quota limits depend on your plan tier — see Section 6.
An Agent represents one of your integrations (one app, one bot, one product line), each holding its own API Key. The number you can create depends on your plan.
Click New Agent in the top-right of the Agents page.
2
Fill in details
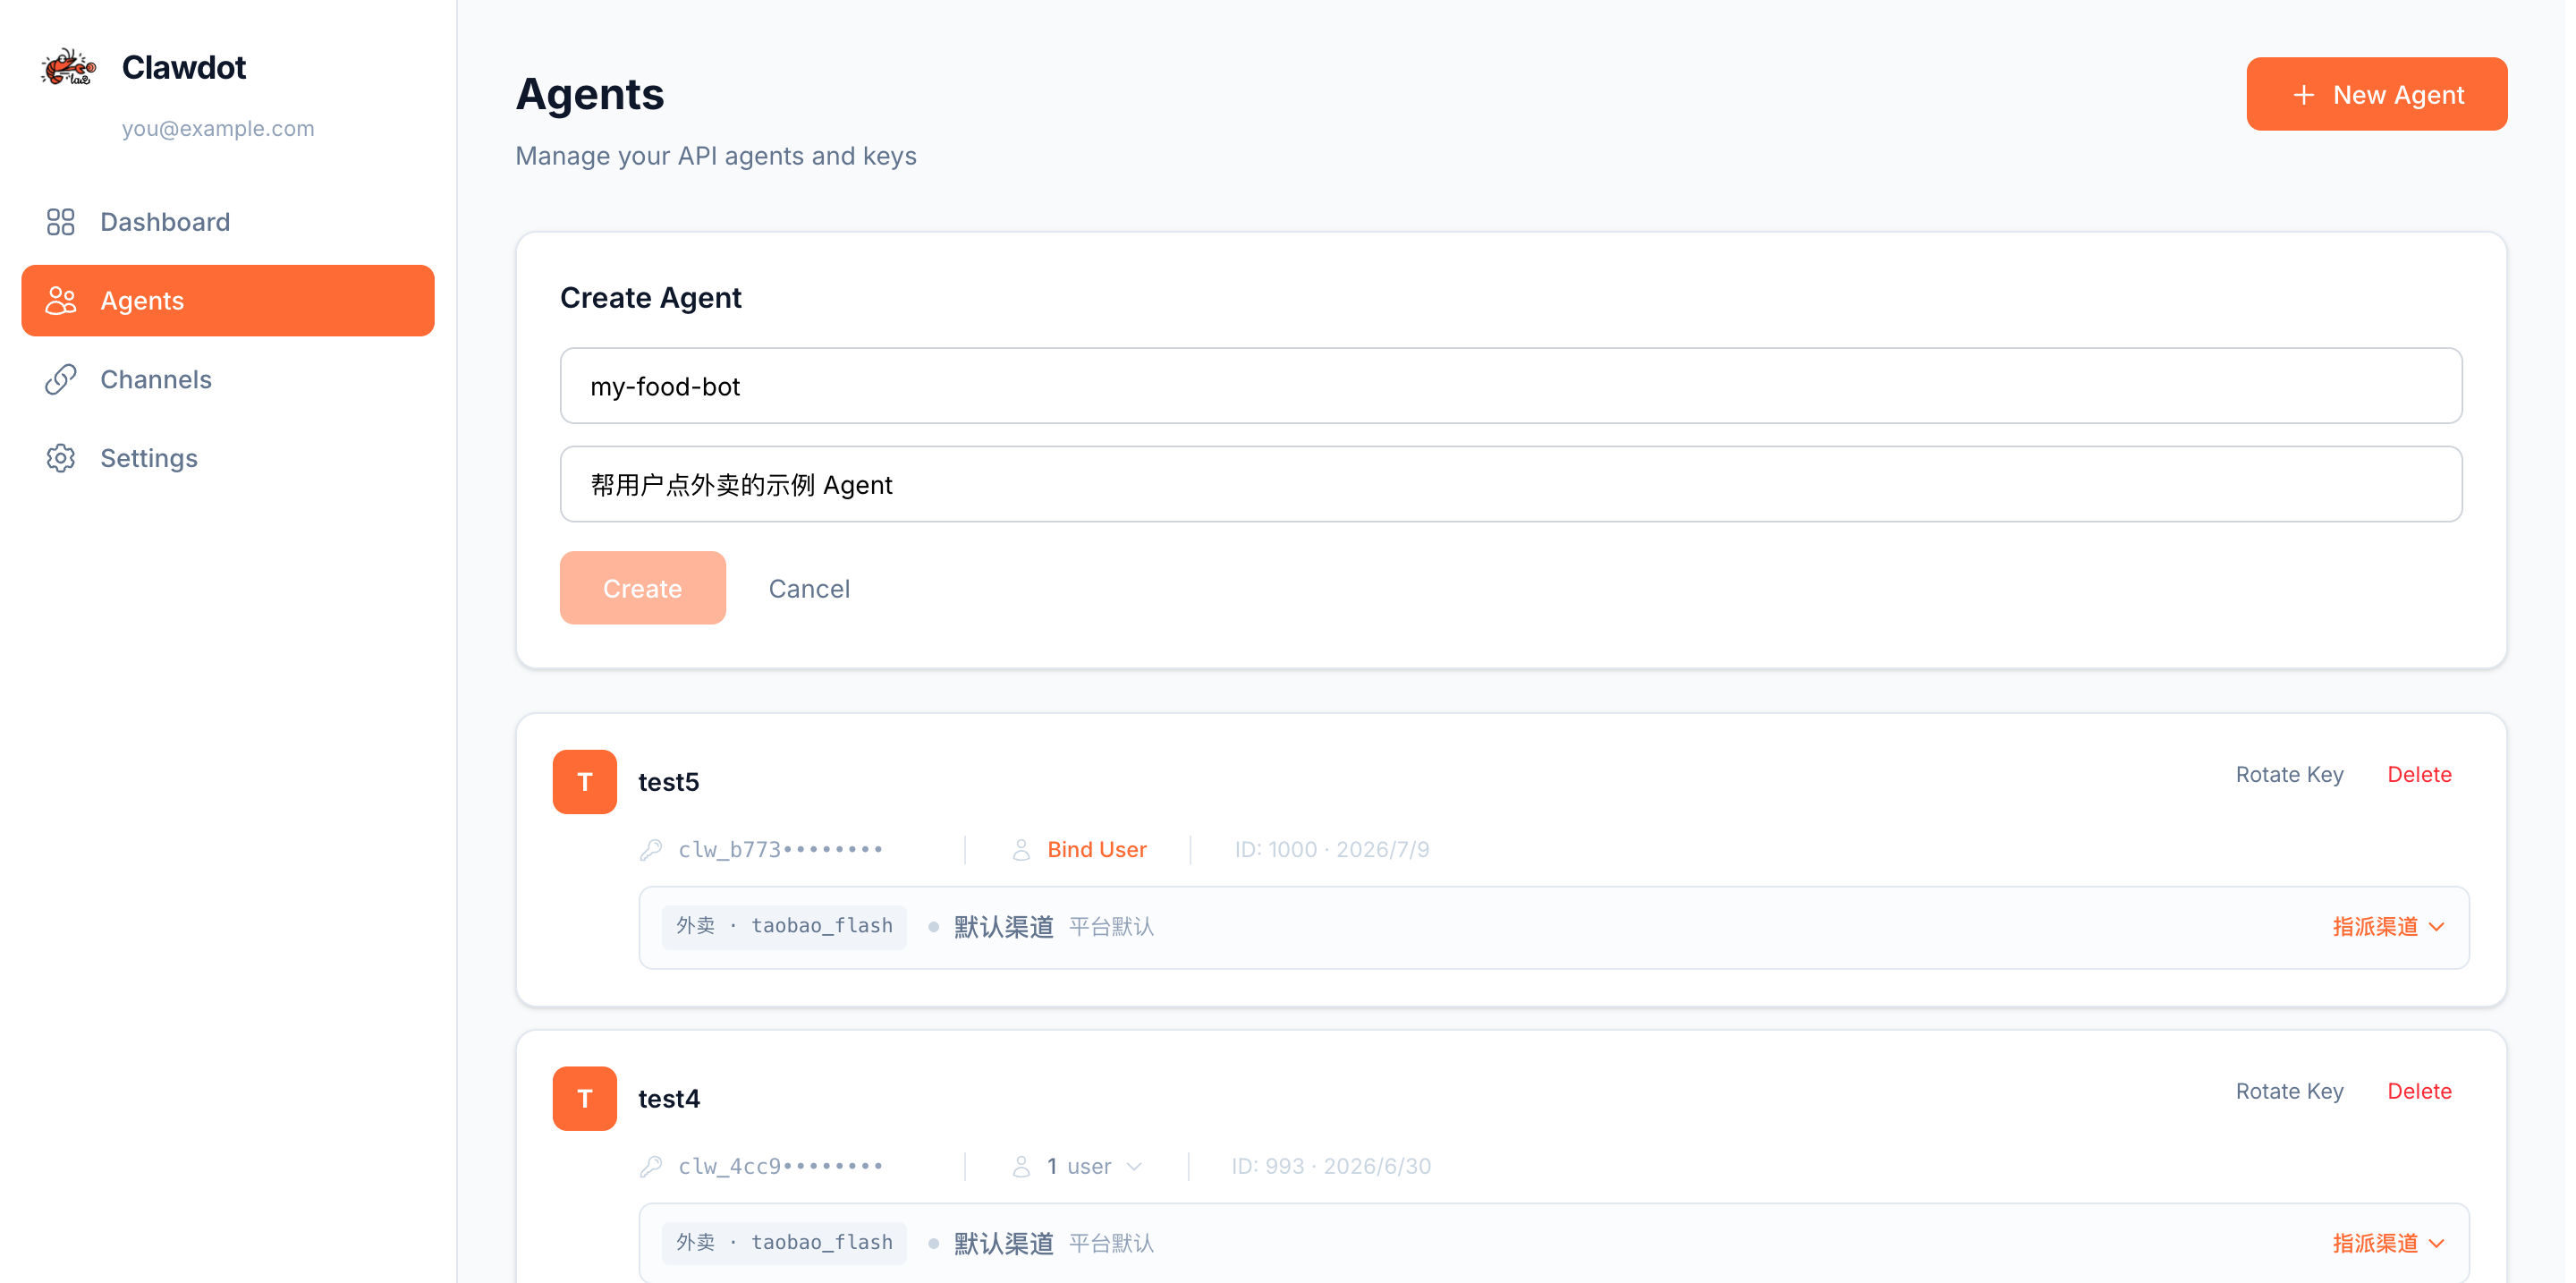
Enter the Agent name (required) and description (optional).
Create Agent form
3
Save the API Key
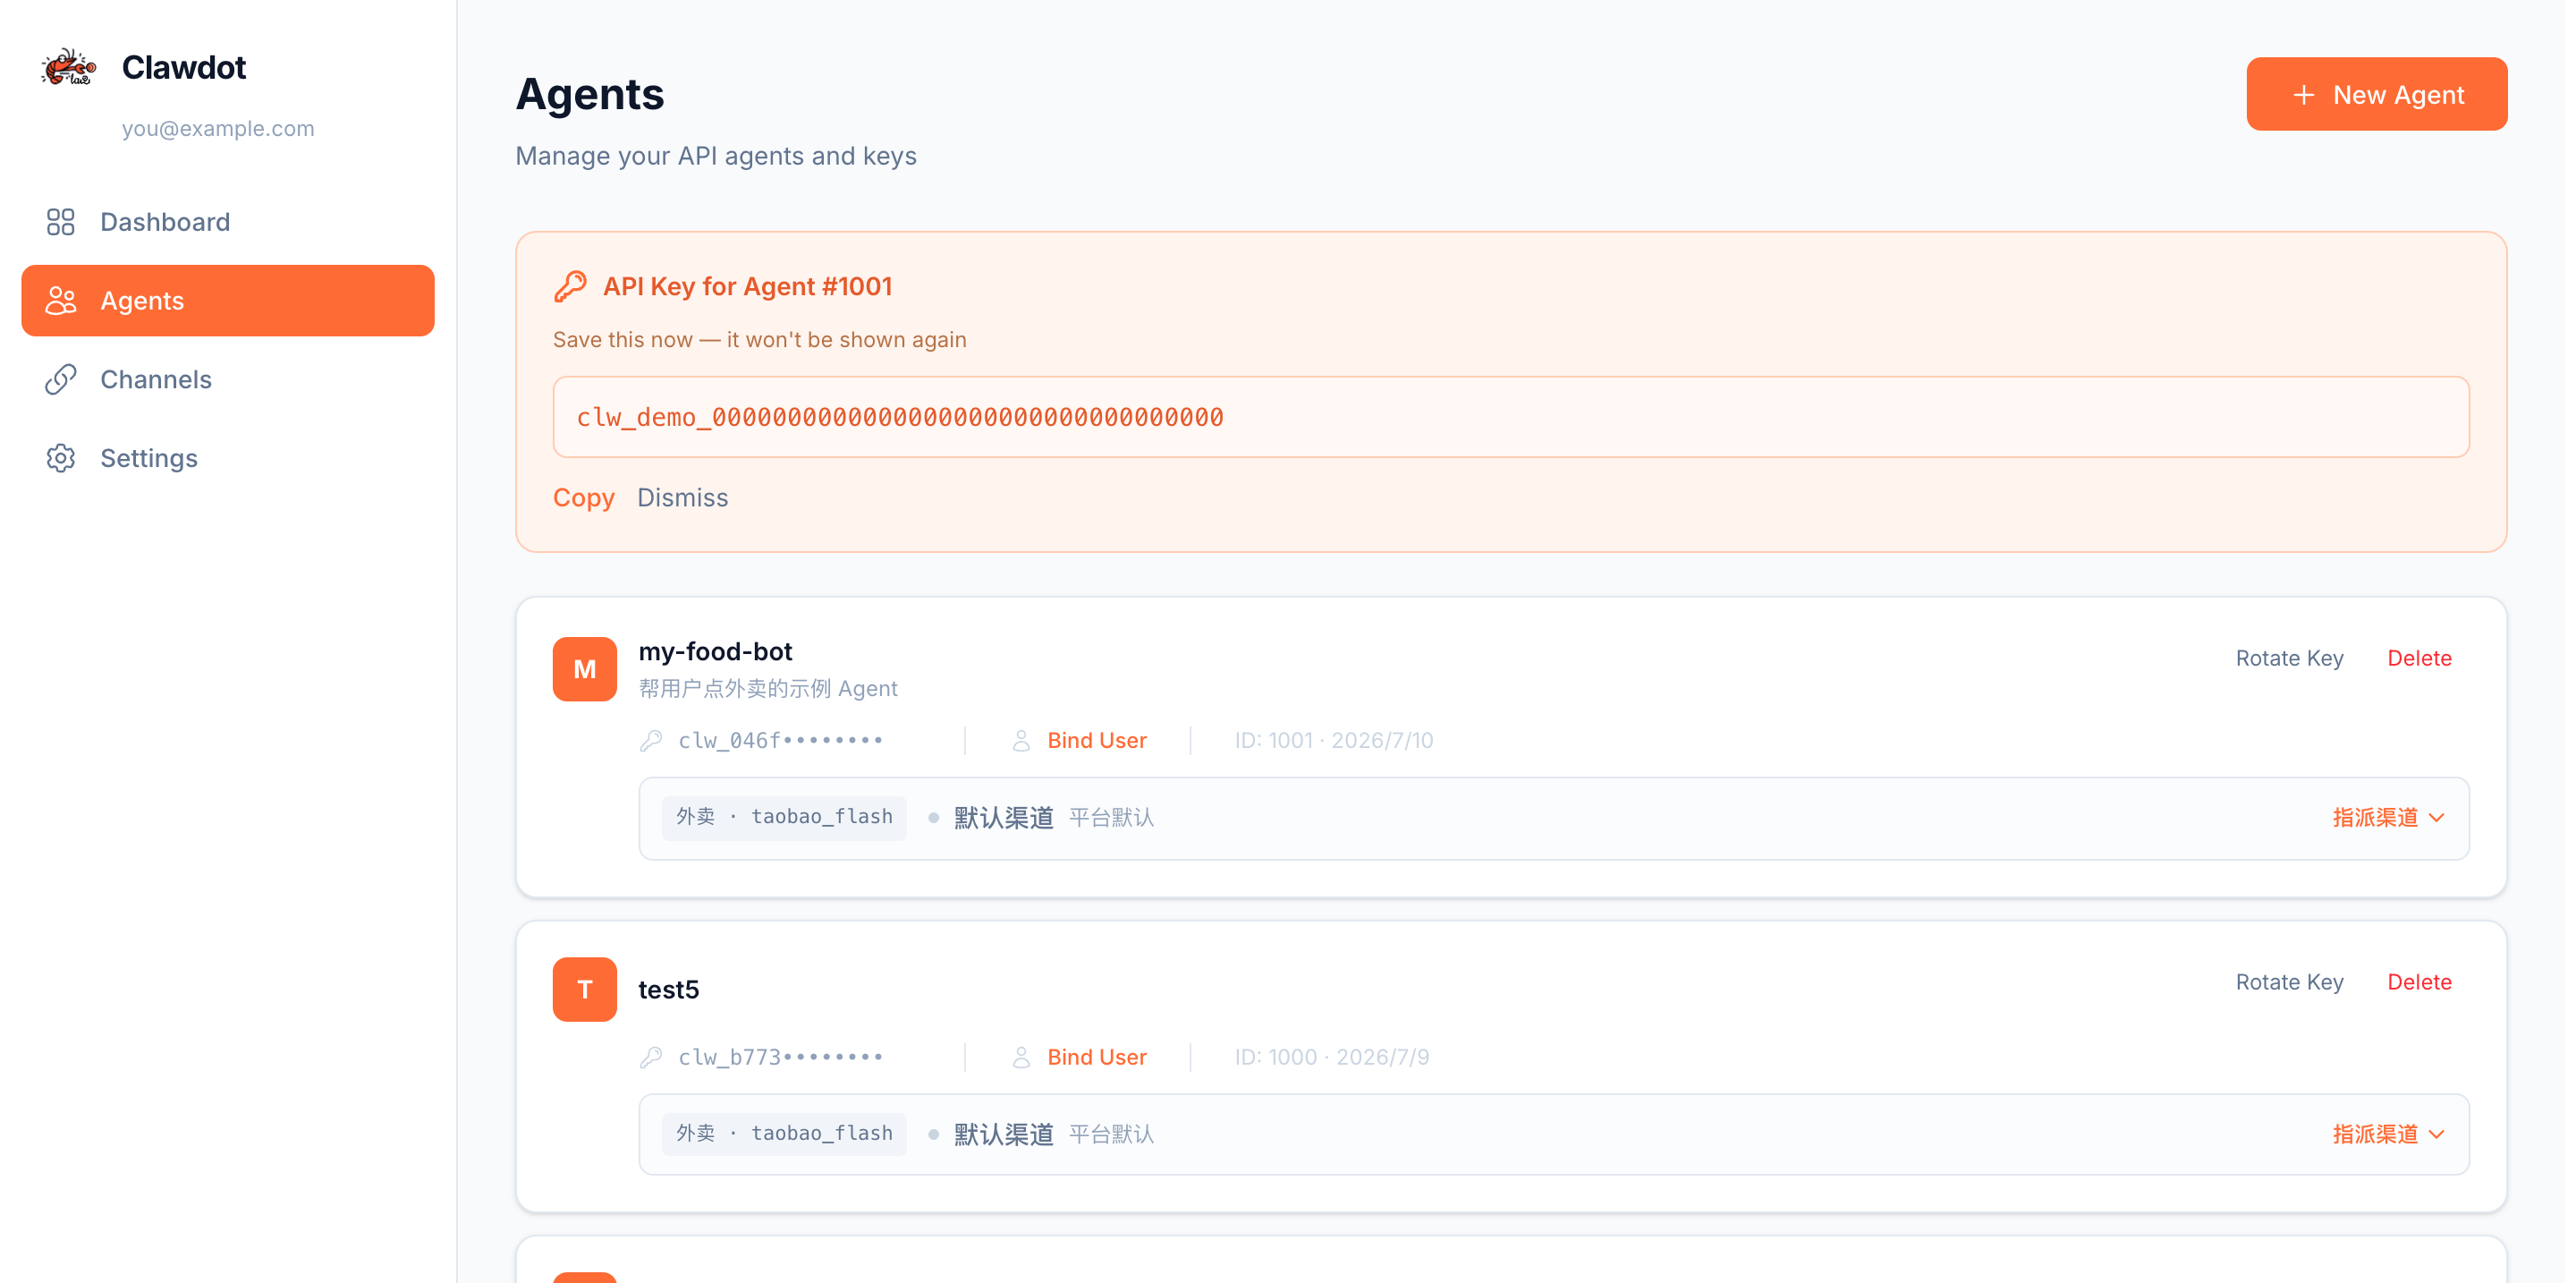
After clicking Create, an orange banner at the top shows the Agent’s full API Key — click Copy. After the banner is dismissed the card shows only the key prefix (e.g. clw_xxxx••••••••), but the copy button next to it still copies the full API Key anytime.
The one-time API Key banner shown after creation
The banner’s “Save this now” is a one-time prompt, but the key itself is never lost — you can copy the full key from the card anytime. Use Rotate Key only when you deliberately want to replace the key (it invalidates the old one).
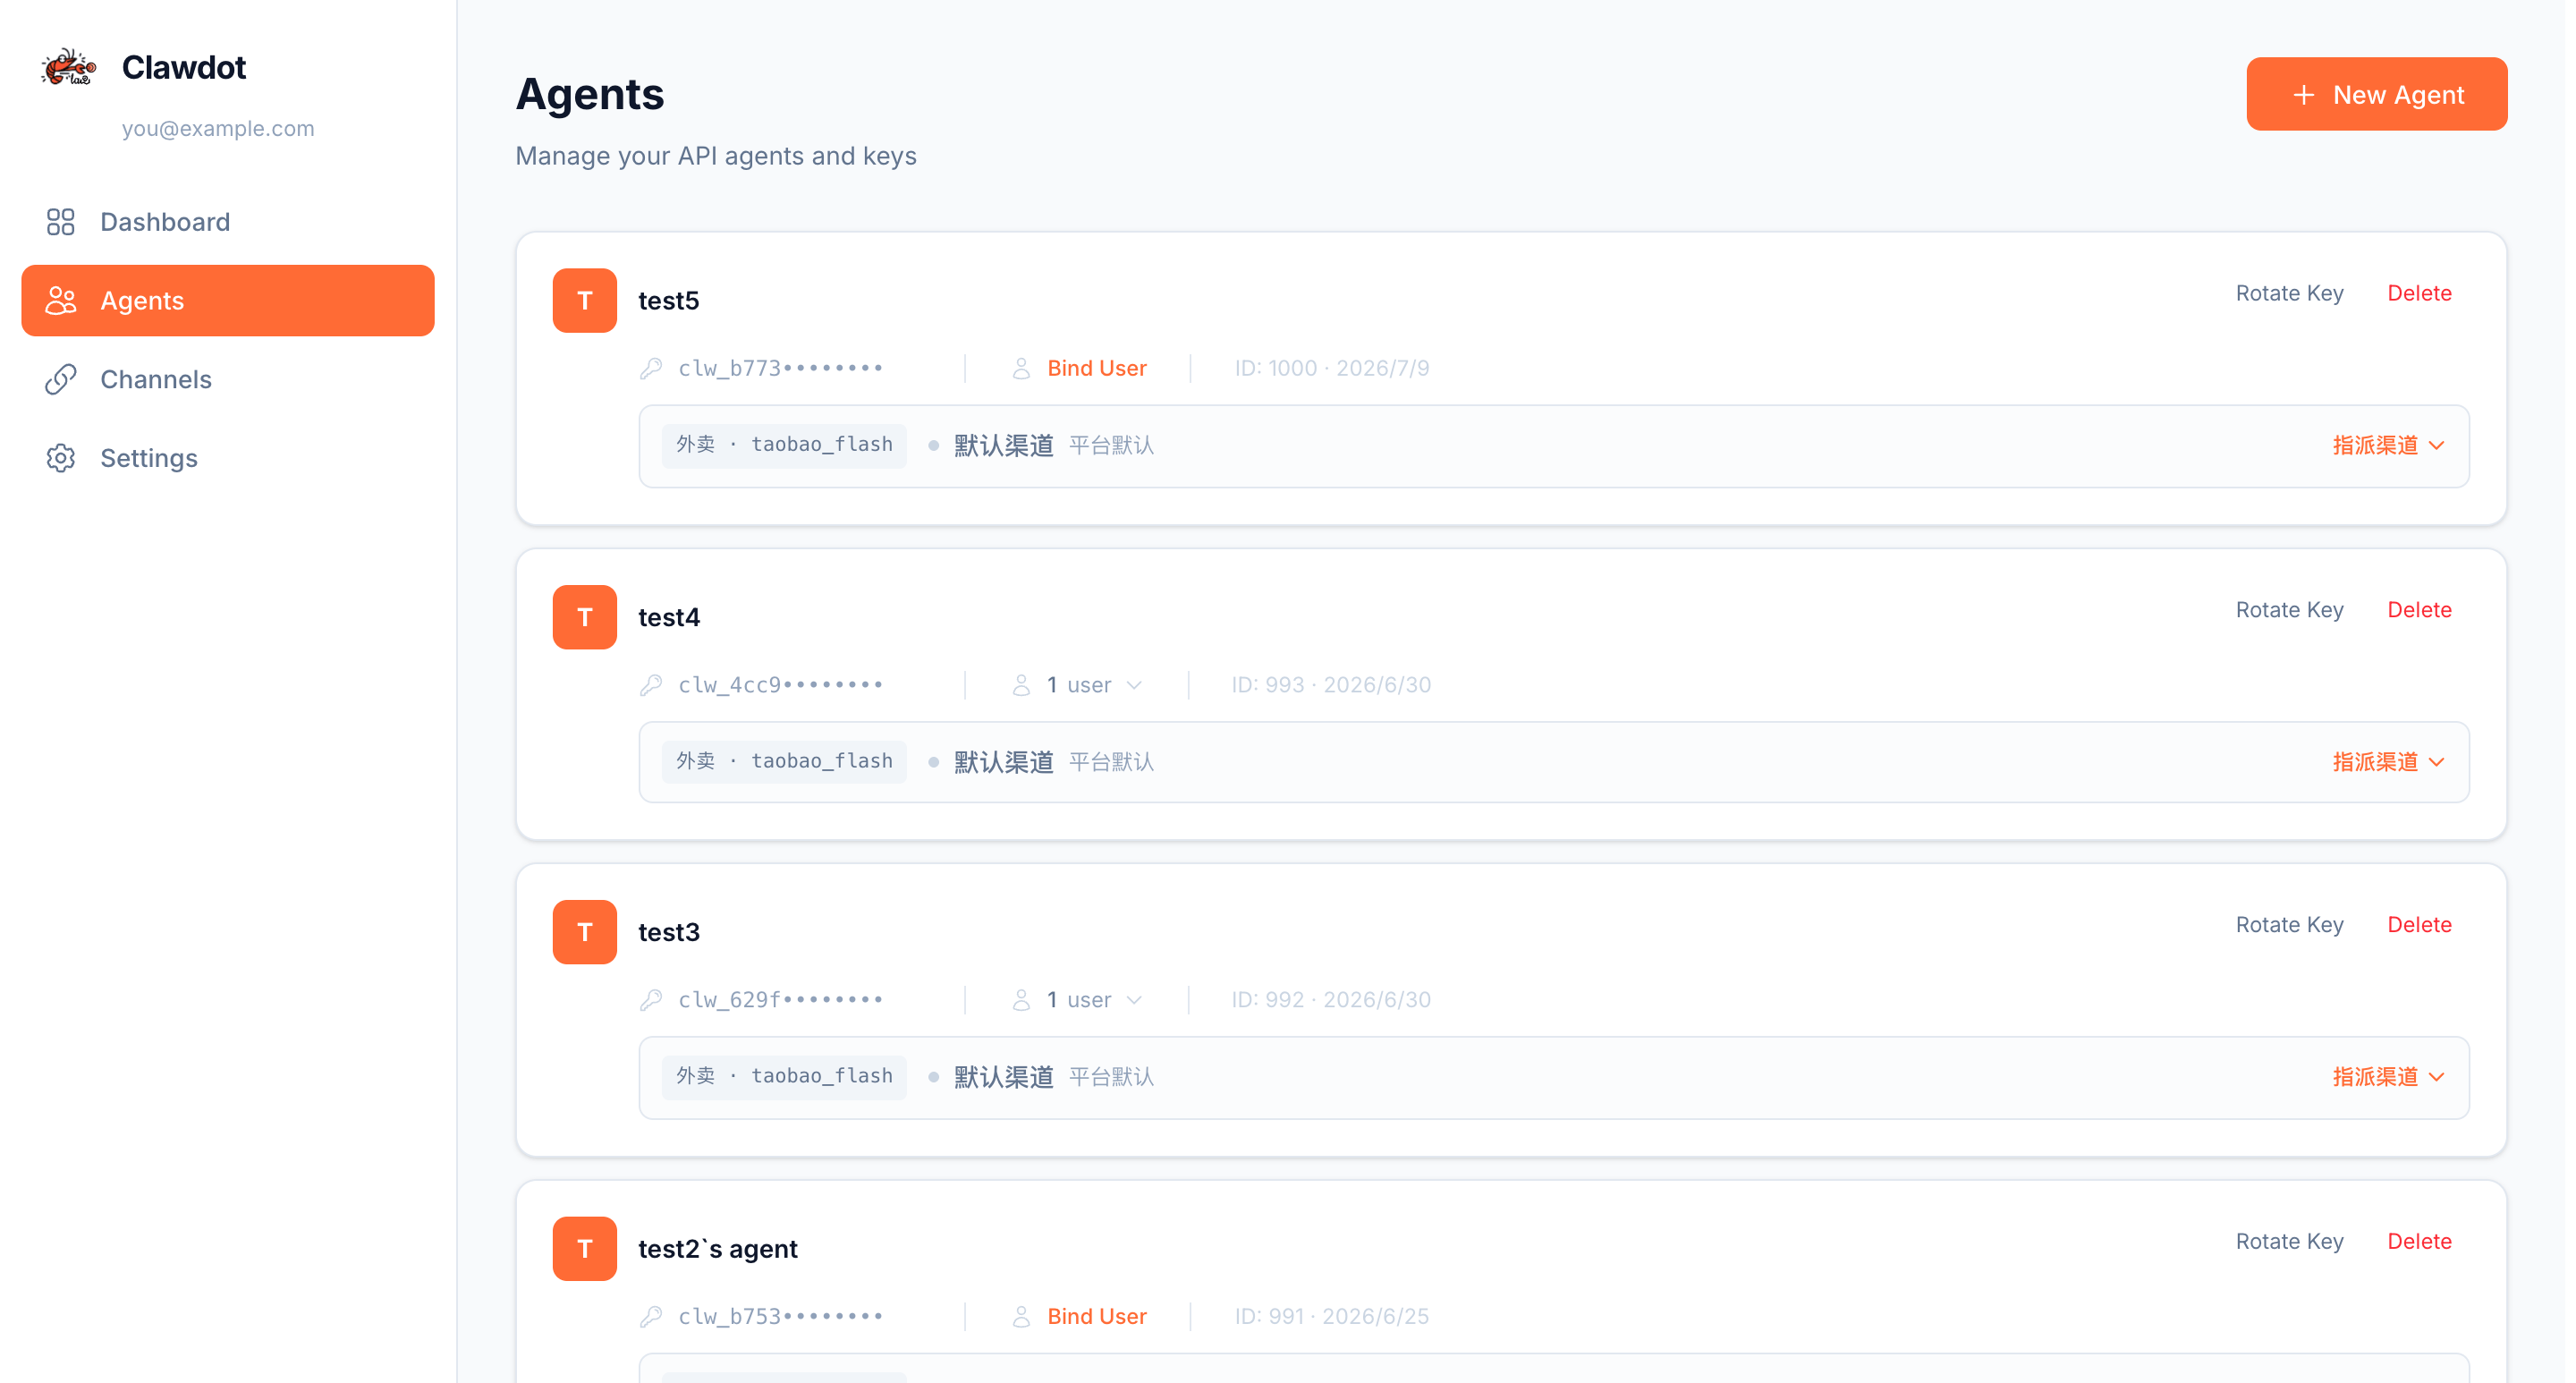
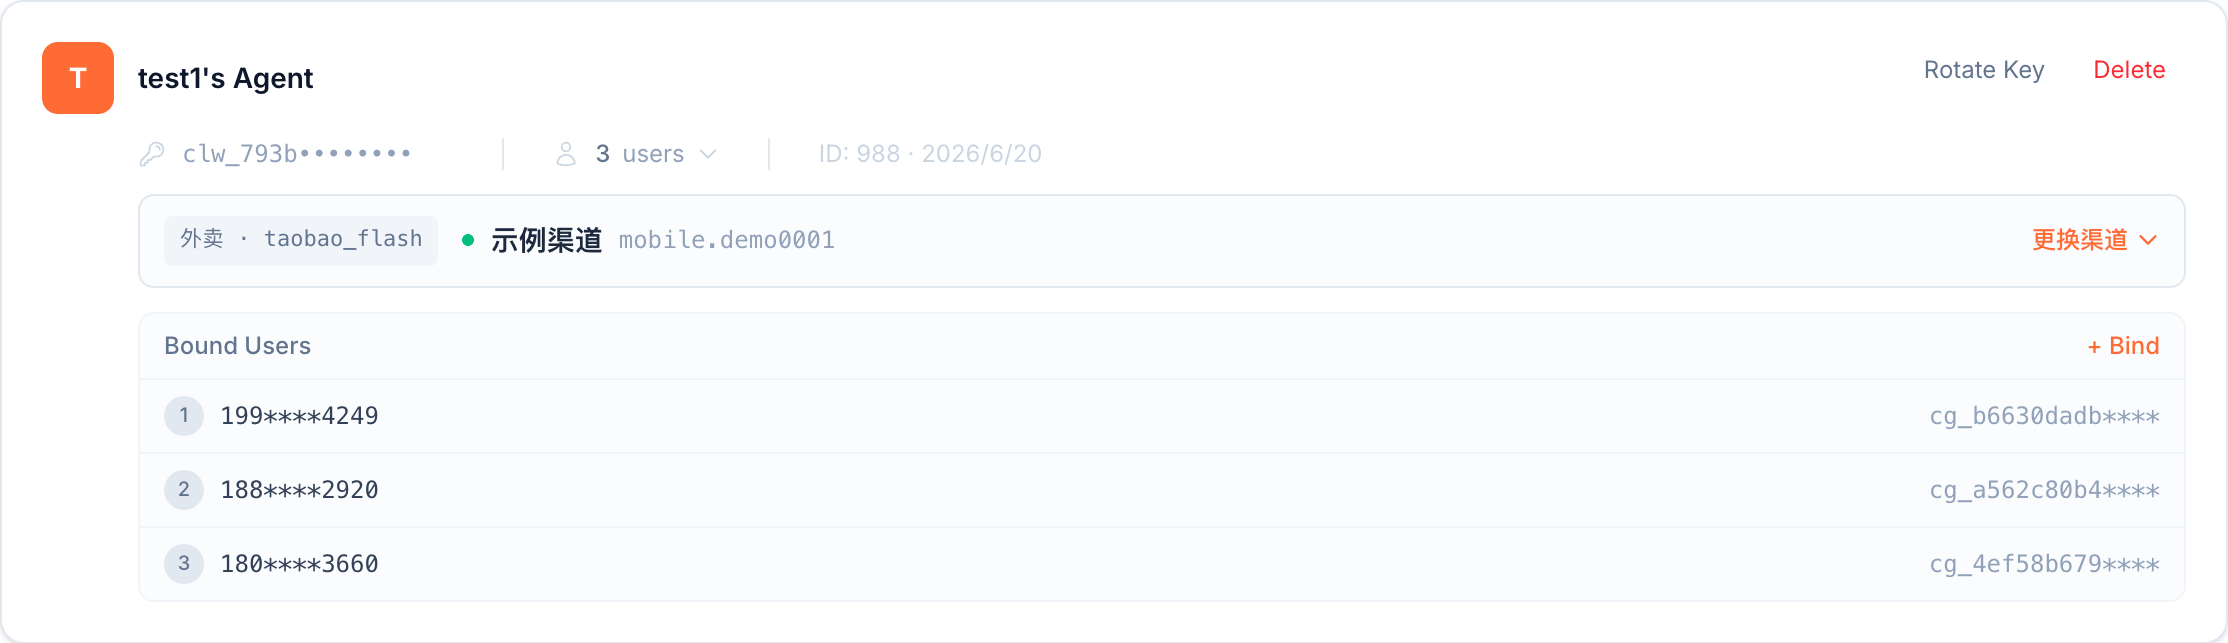
An Agent card: Rotate Key, Delete, bound-user count, key prefix
Action
Description
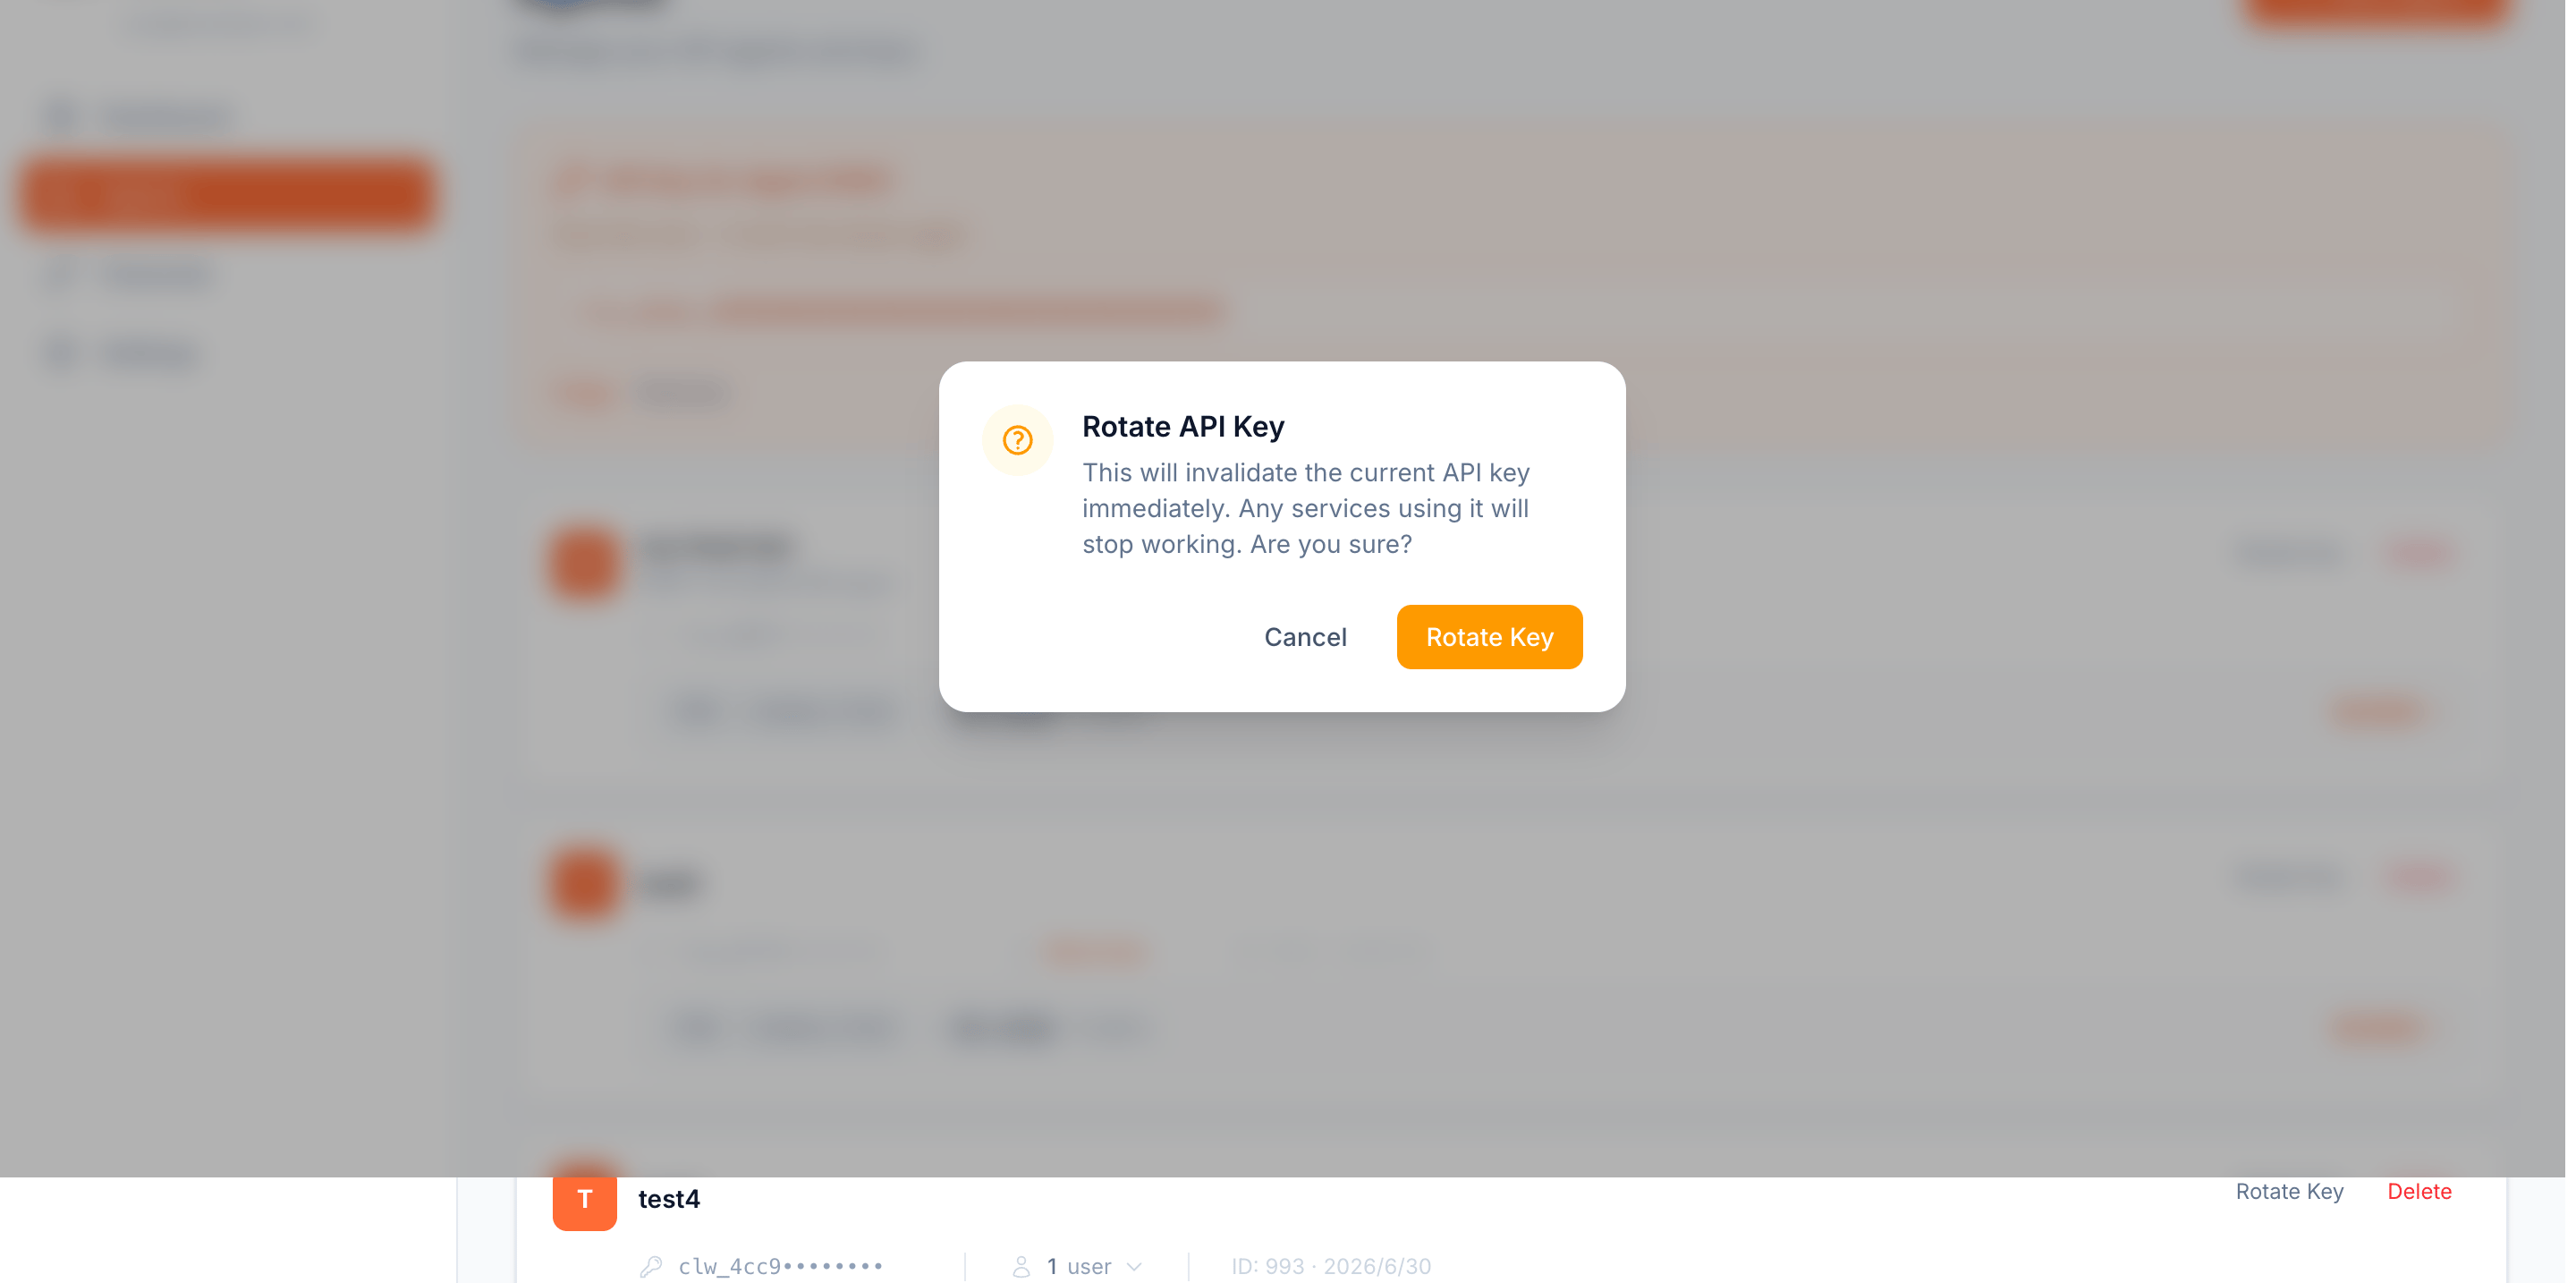
Rotate Key
Generate a new Key and invalidate the old one immediately. Prompts for confirmation; make sure your production services are ready to switch keys first, to avoid interruption. The new key can also be copied from the card afterward.
Delete
Permanently delete the Agent and its Key, irreversible, with a confirmation prompt.
Bind User
Bind an end user’s phone number (see 3.3).
Key prefix / copy
The card shows a masked prefix for identification; the copy button next to it copies the full API Key, anytime and unlimited times.
Before an Agent can order on a user’s behalf, it must complete a one-time user authorization. Click Bind User on the card; the flow has three steps:
1
Enter phone number
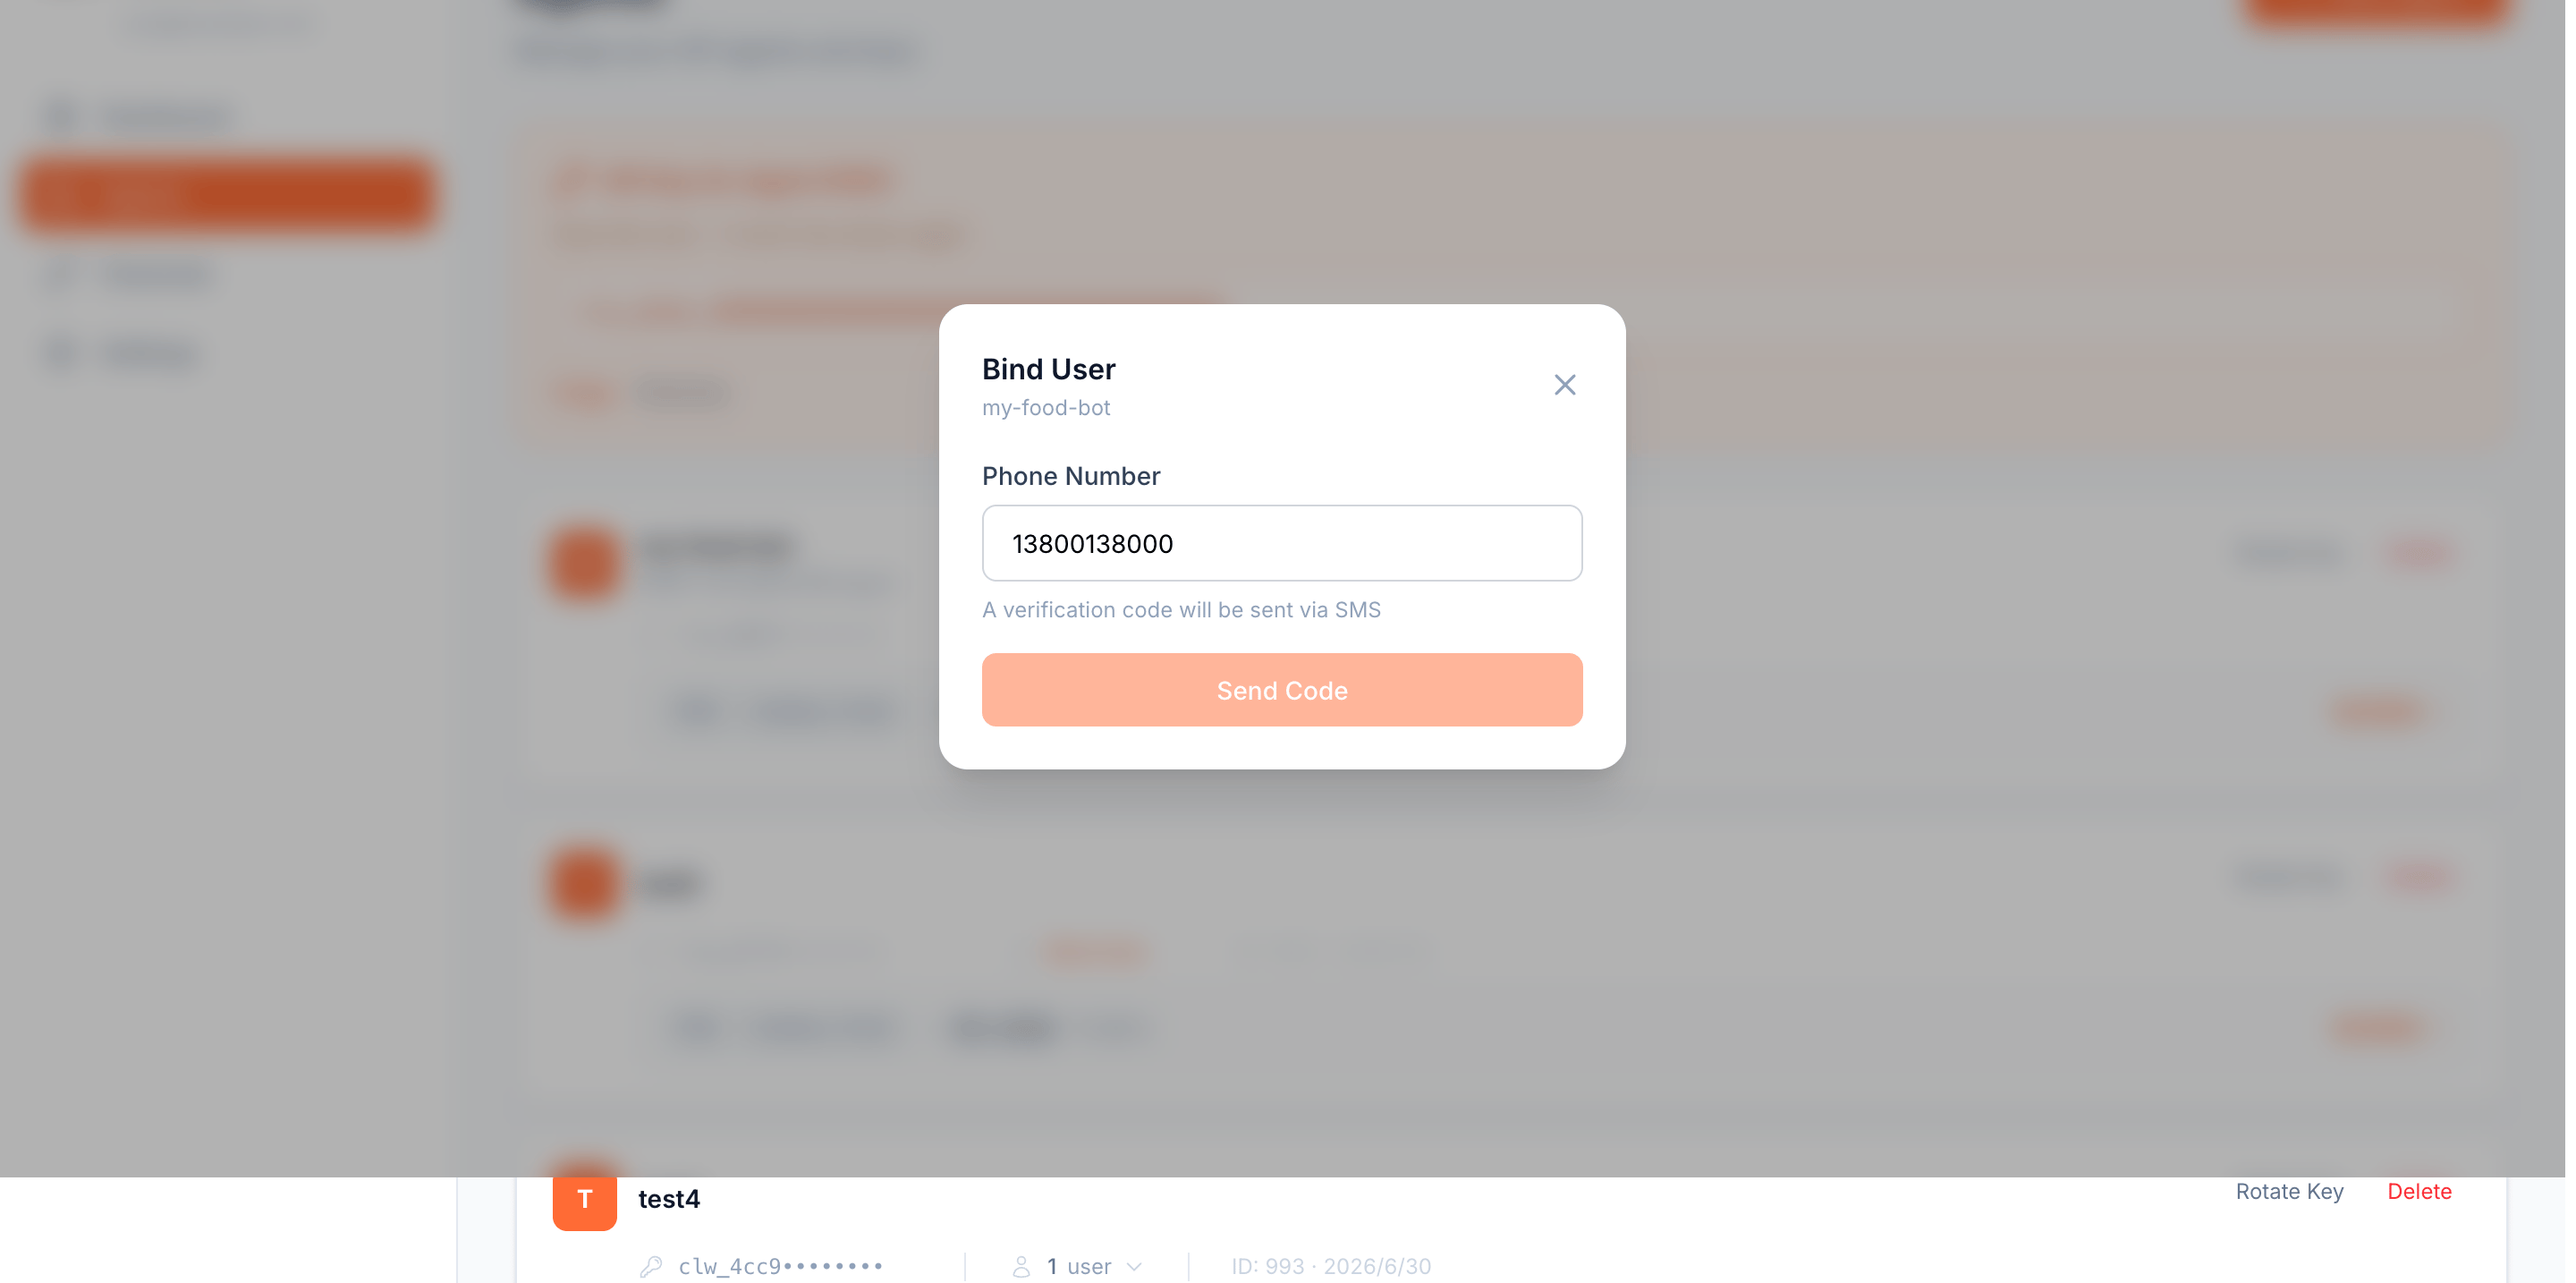
Enter the user’s phone number and click Send Code to send an SMS verification code.
Step 1: enter phone number
2
Enter the code
Enter the 6-digit code and click Bind (resendable after 60s; you can also go back to change the number).
3
Save the Consent Grant ID
On success, the page shows the user’s Consent Grant ID. When calling the API, pass this credential via the consent_grant_id parameter (or the X-Consent-Grant-Id header) to act as that user.
The Consent Grant ID is shown only once; the server stores only a hash, so copy it immediately. Re-running the bind flow for the same phone number issues a new Consent Grant ID and invalidates the old one — always use the latest one issued, and update your service config accordingly.
The “N users” link on the card expands the bound-user list: phone numbers and grant IDs are masked. Beyond 6 users a search box lets you filter by phone or grant-ID fragment; + Bind in the top-right binds another user.
Expanded bound-user list, phone numbers and grant IDs masked
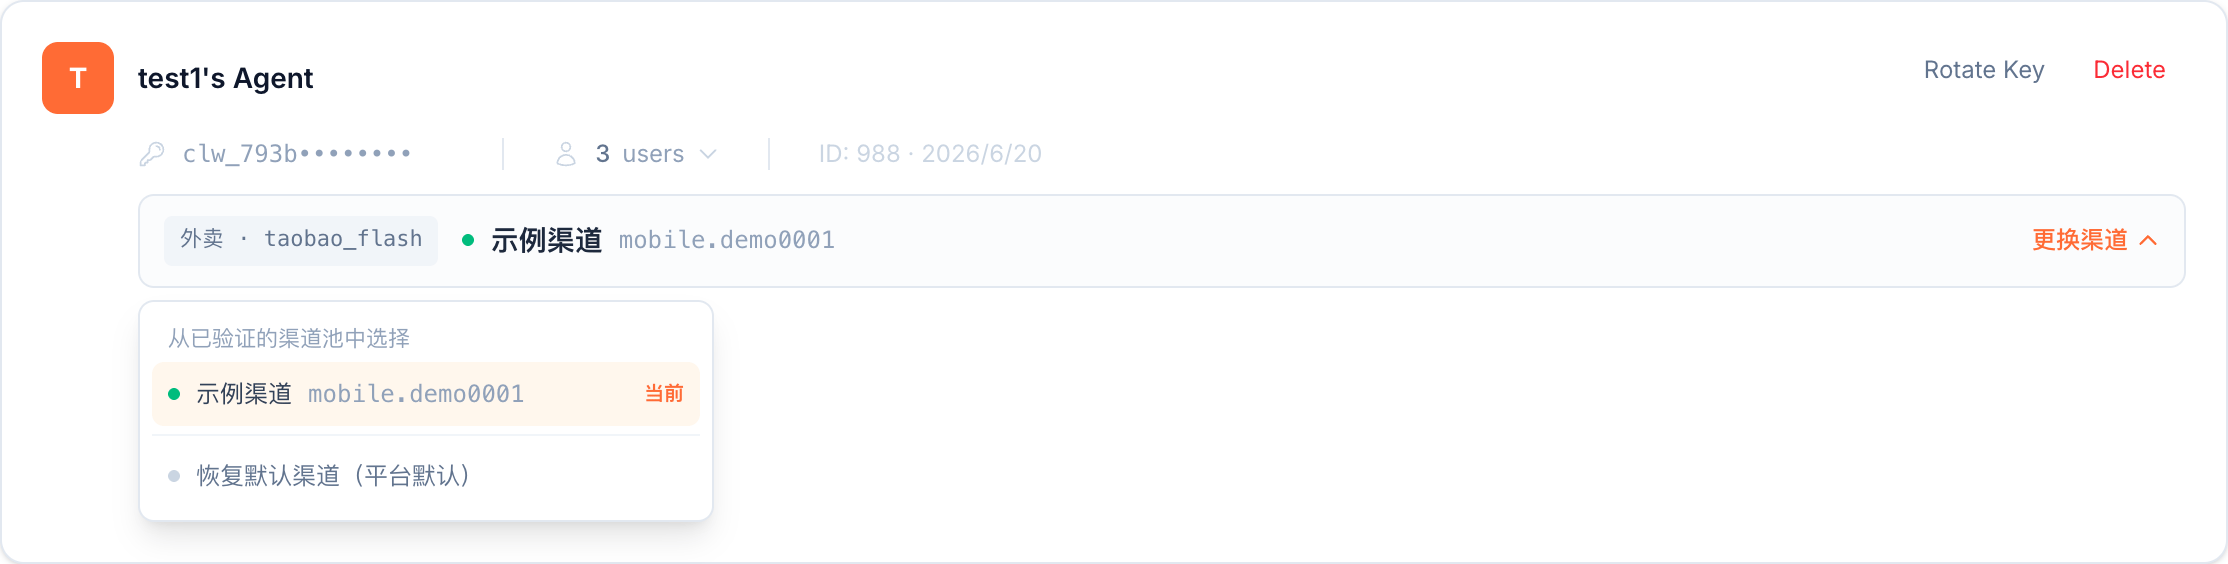
If your plan has the channel feature enabled, a channel bar appears below each Agent card showing the channel that Agent currently orders through. It defaults to 默认渠道(平台默认)(Default channel / platform default). Click 指派渠道 / 更换渠道 (Assign / Switch channel) to pick a validated channel from your pool — it takes effect instantly. An assigned Agent can choose 恢复默认渠道 (Restore default) to revert.
Expand the channel bar and pick from your validated channel pool
Adding and validating channels is covered in Section 5.
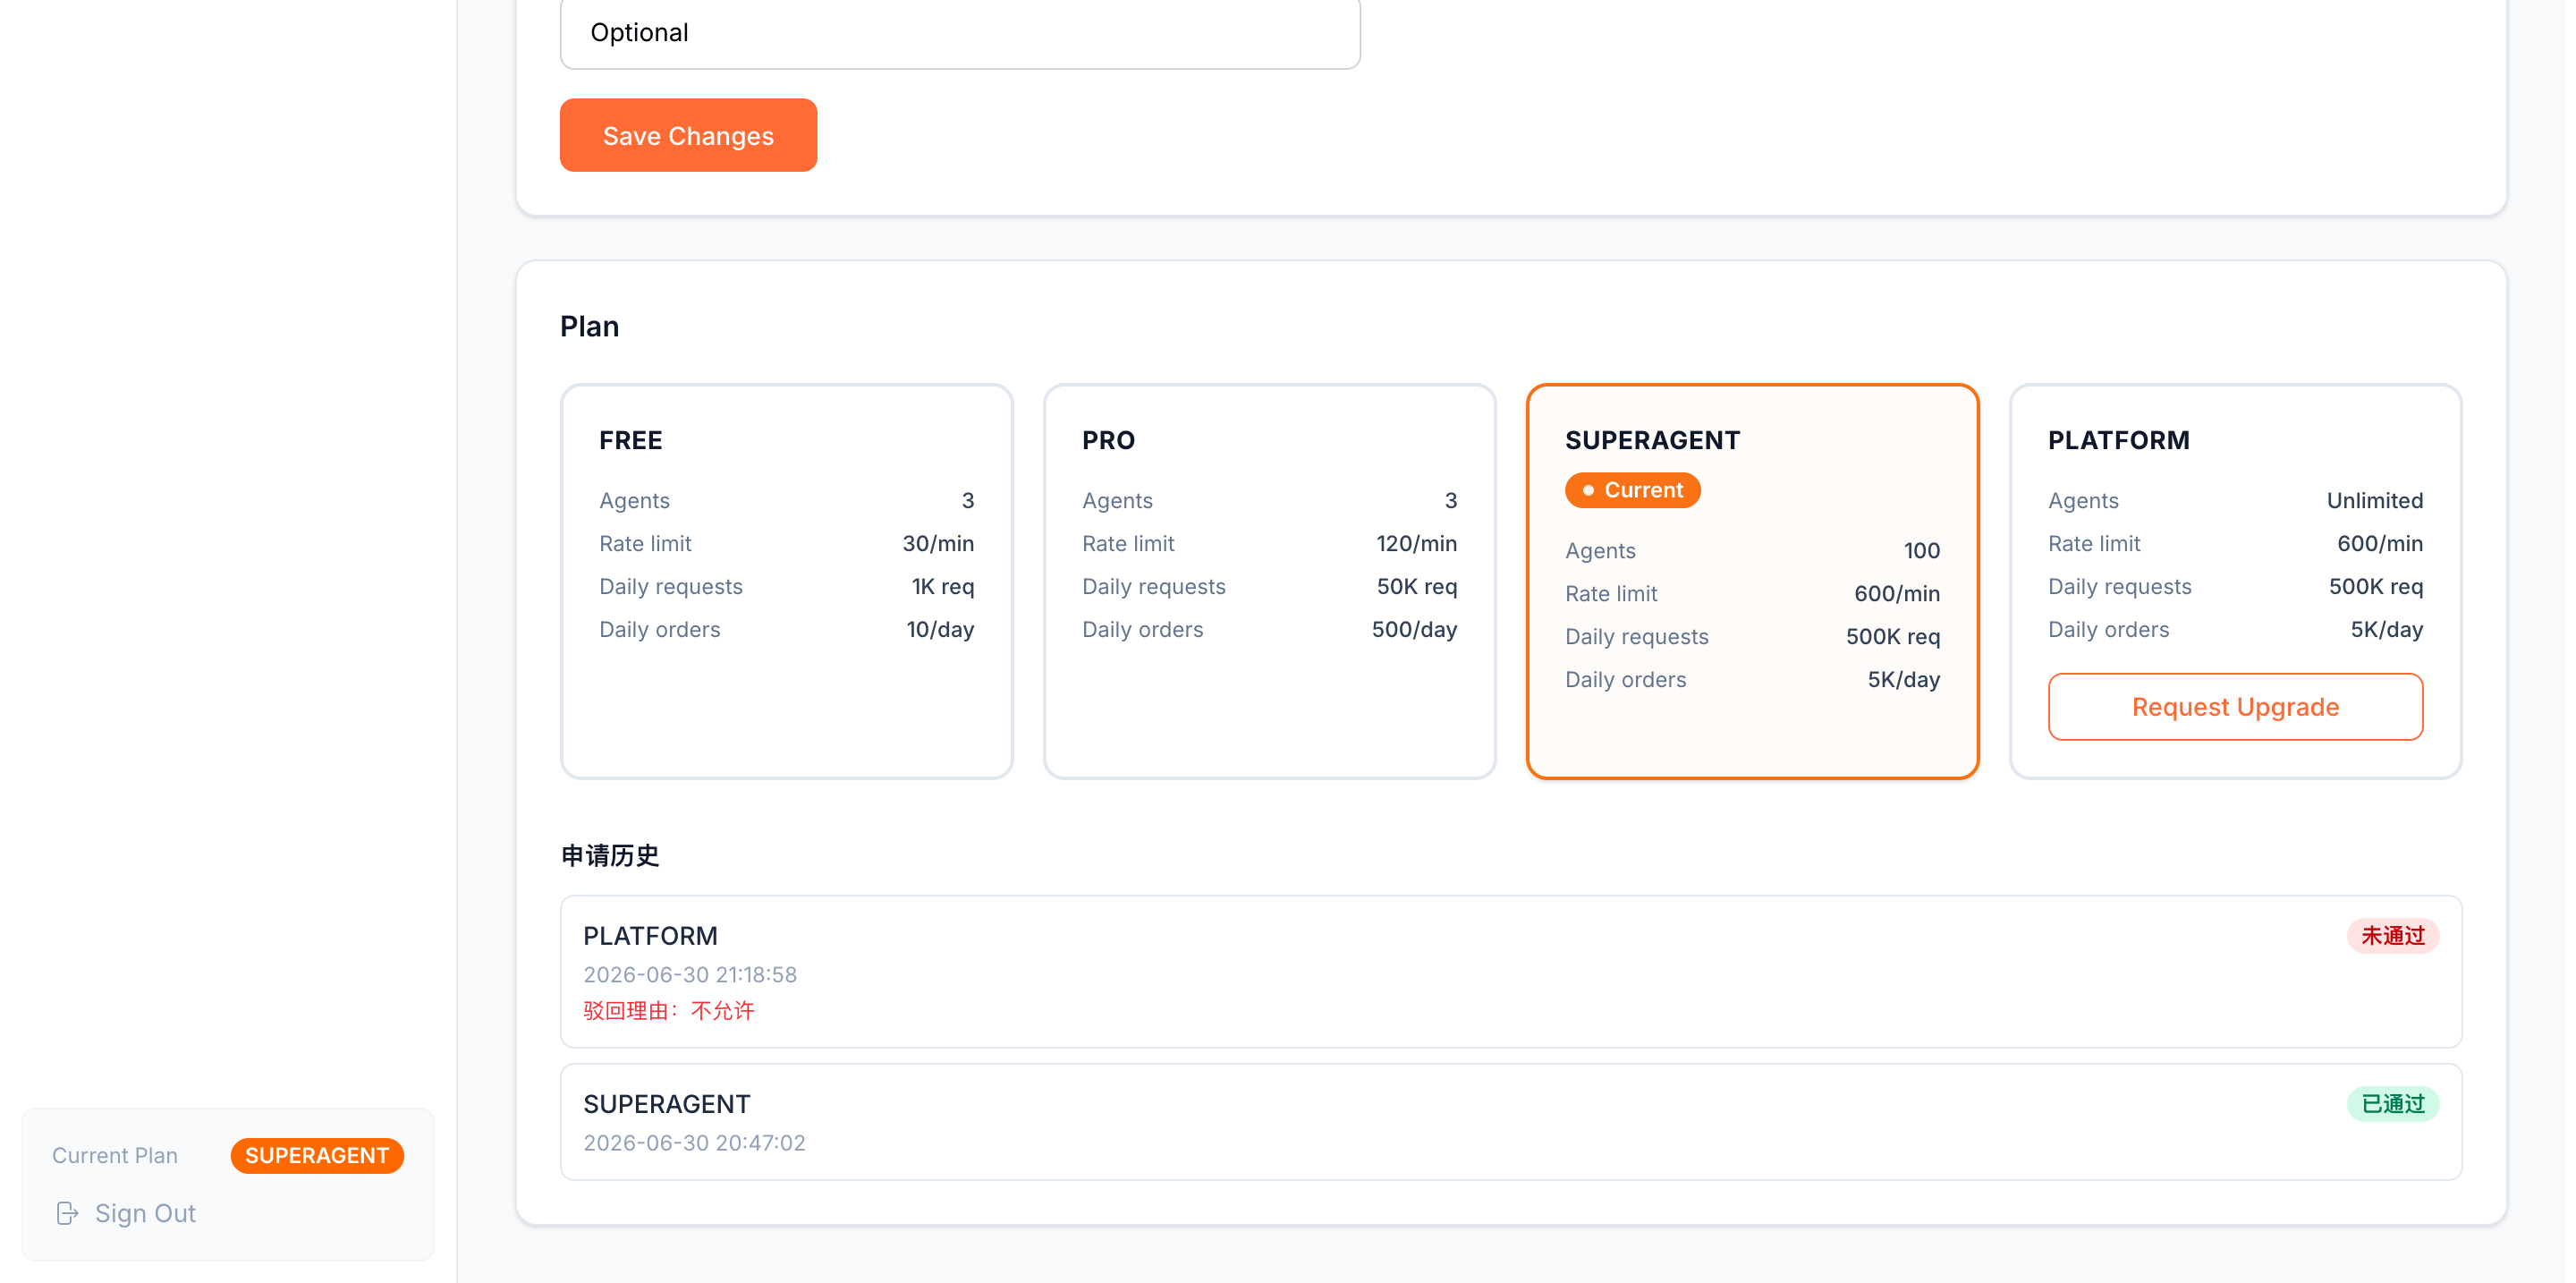
Before enabling the channel feature, understand what each plan can do — the channel feature is only available on SUPERAGENT and PLATFORM. See Section 6 for plan details.
On a non-superagent / platform plan, this page shows “渠道功能未开放” (Channel feature not enabled). Request an upgrade in Settings first.
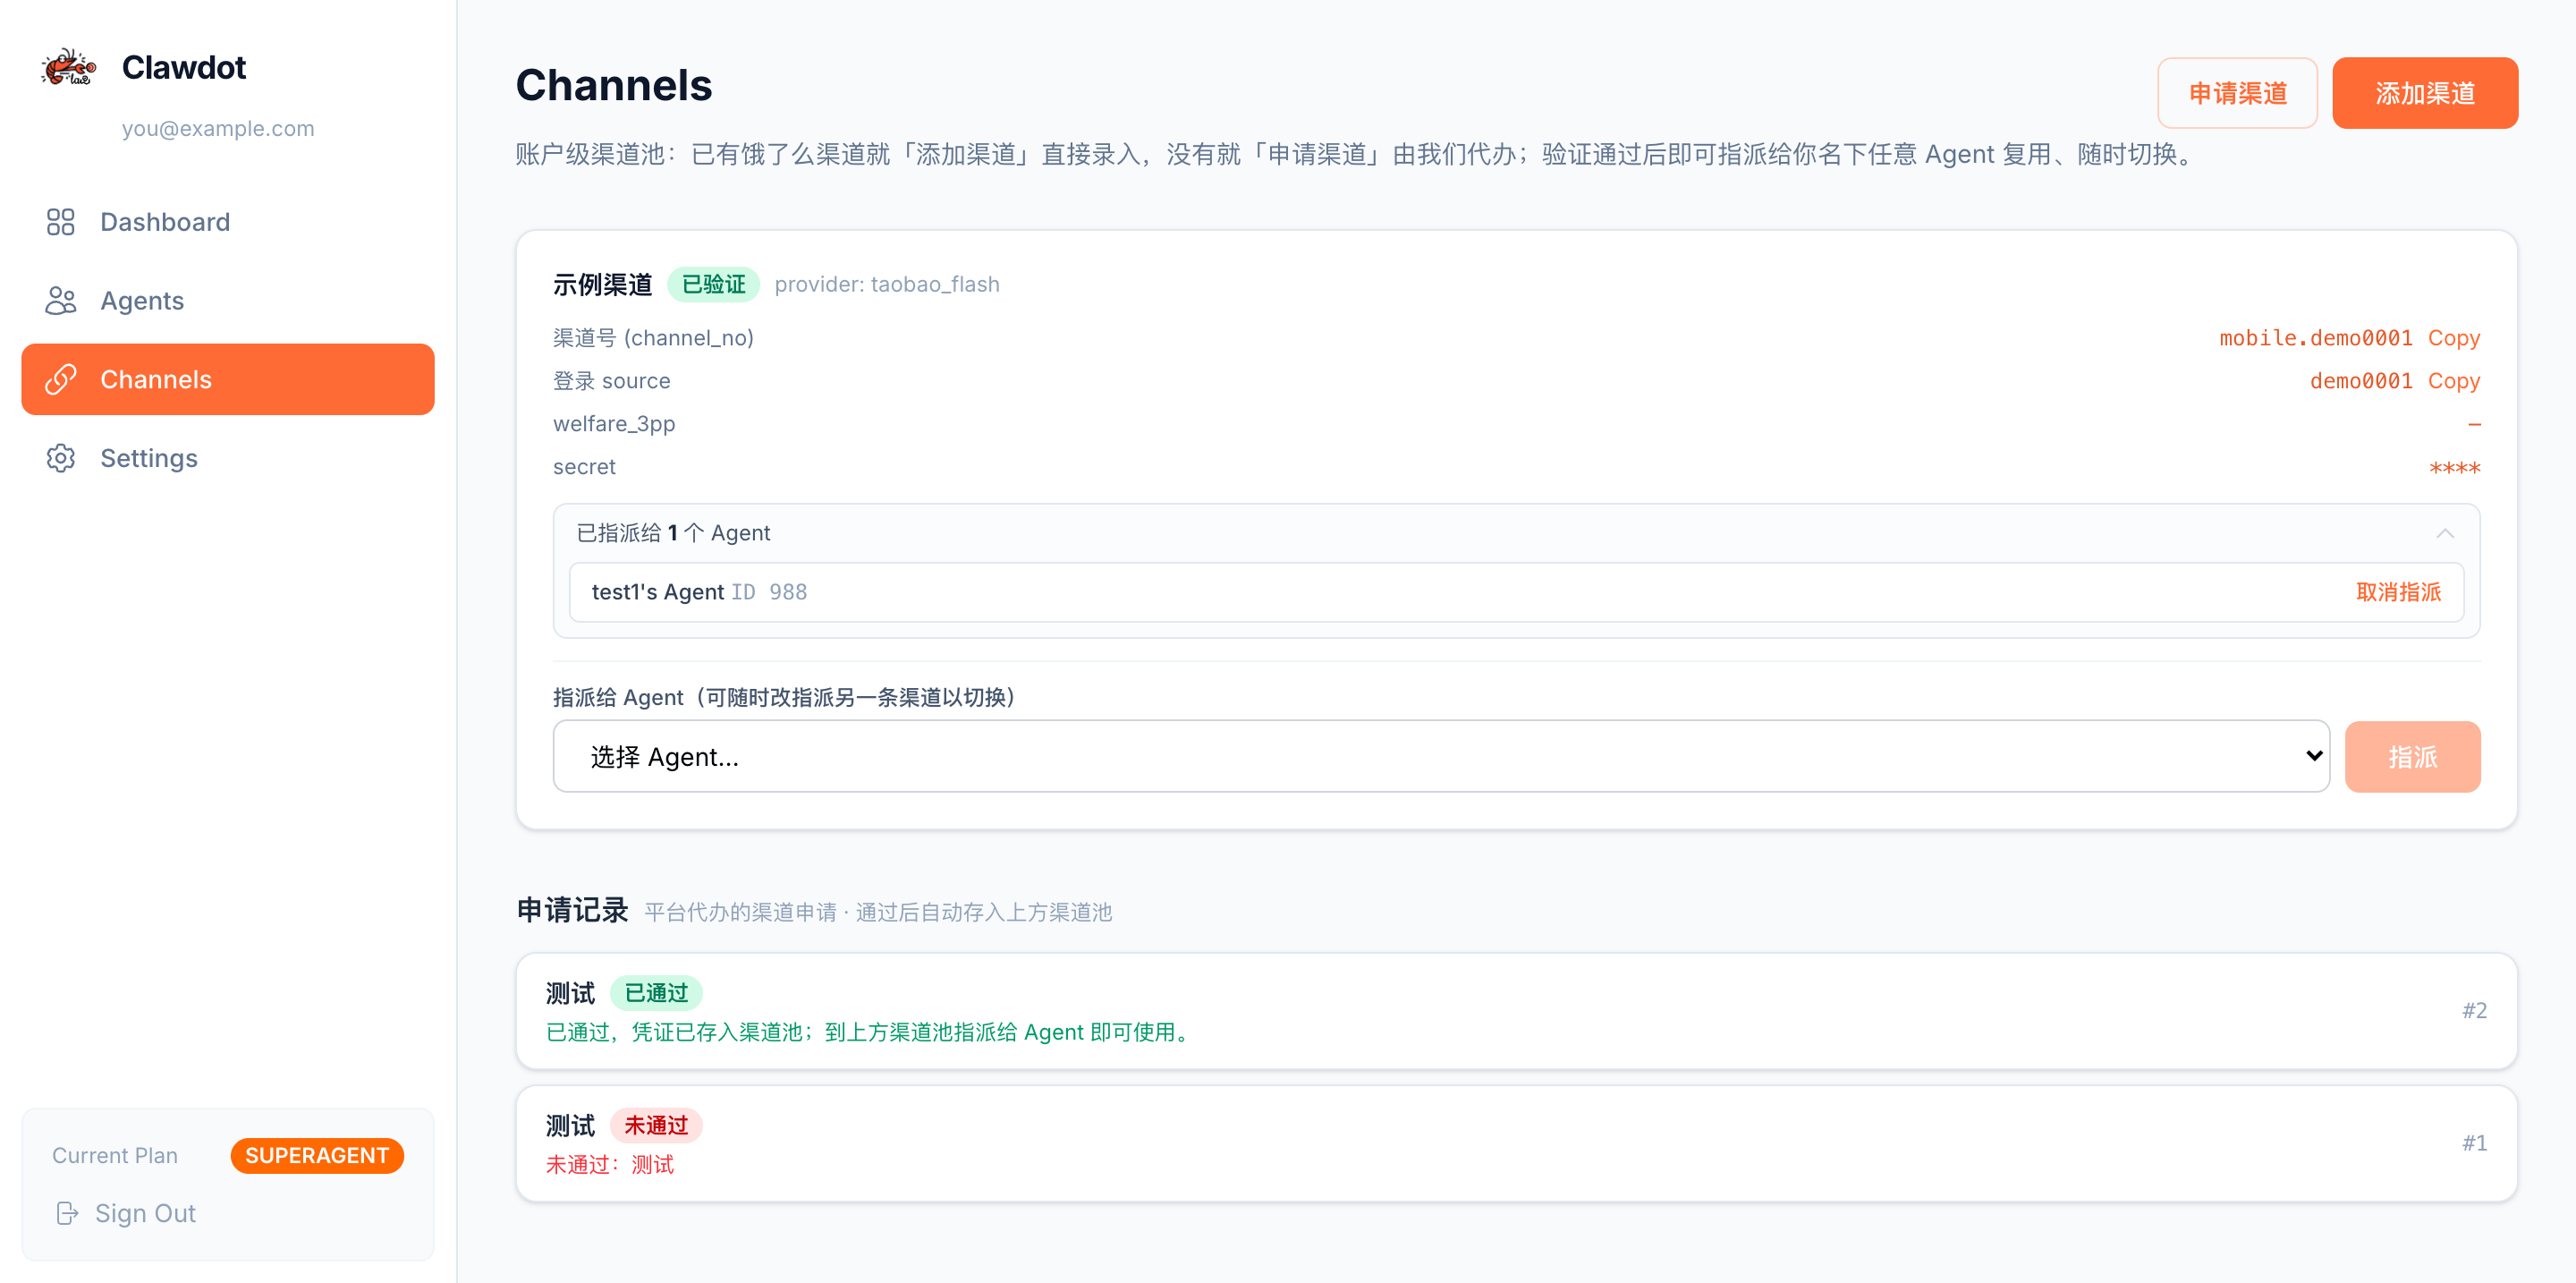
The channel pool is account-level: once a channel is validated, you can assign it to any number of your Agents and switch anytime. There are two ways to obtain a channel.
Channels page: account-level channel pool + application records
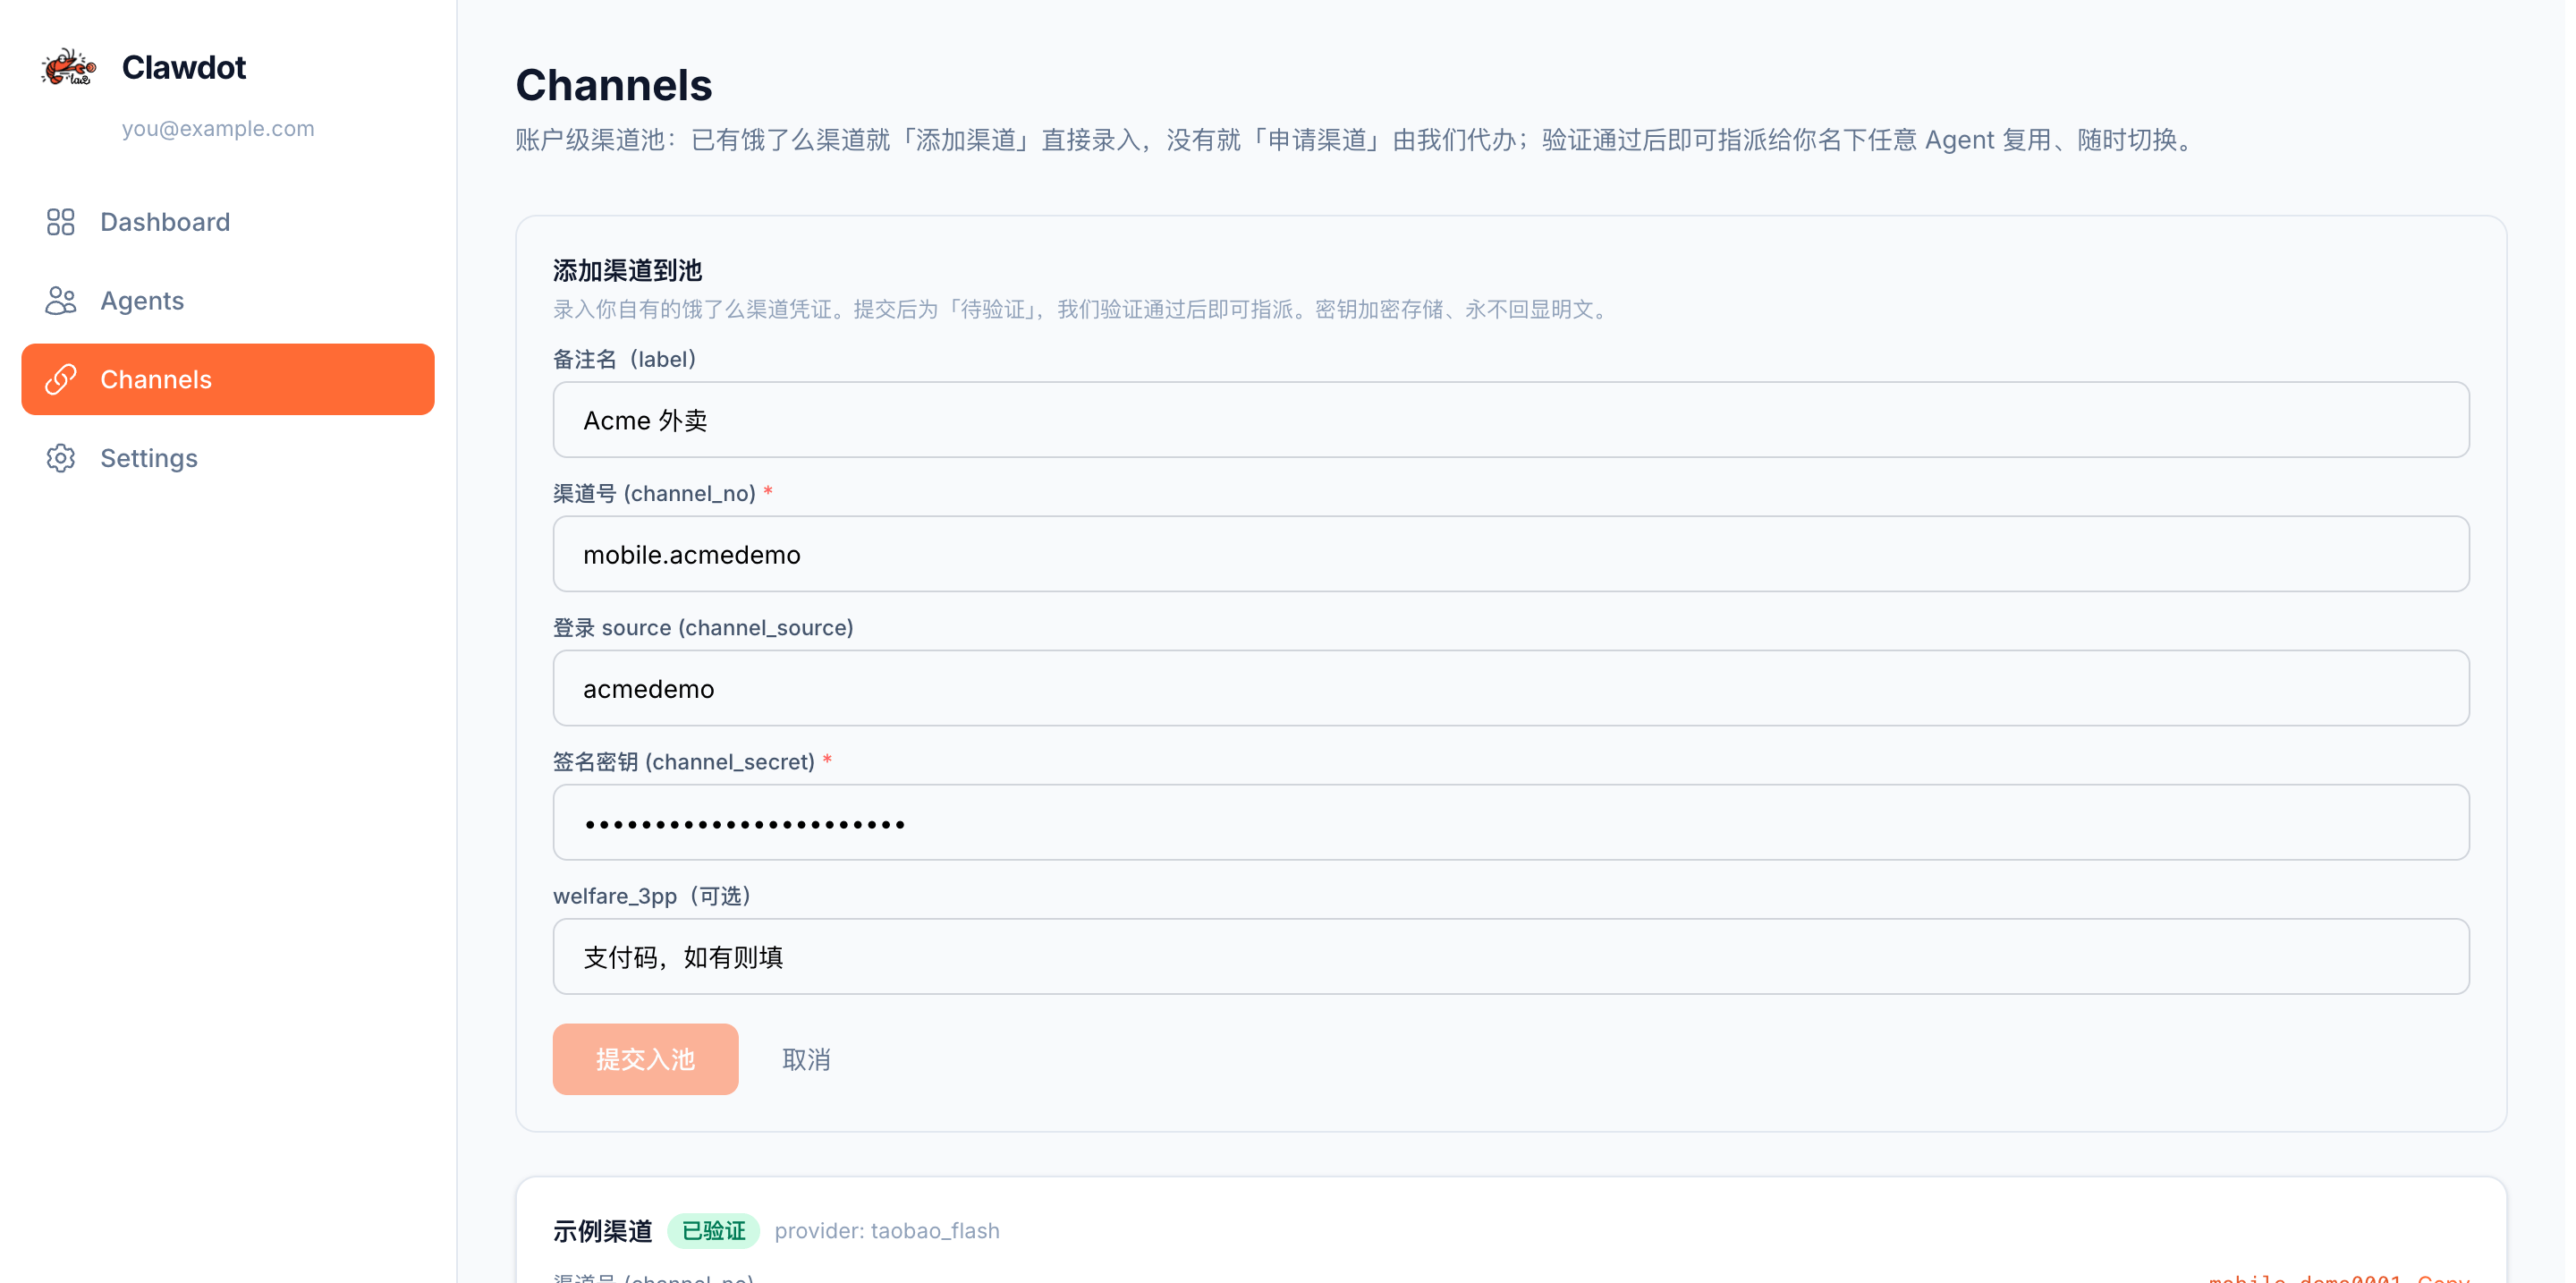
5.1 Already have an Ele.me channel → 添加渠道 (Add channel)
If you already have your own Ele.me channel credentials, click 添加渠道 (Add channel) in the top-right to enter them directly:
Field
Description
备注名 (label)
Optional, for easy identification, e.g. “Acme Delivery”
渠道号 (channel_no) ✱
Formatted like mobile.xxxx
登录 source (channel_source)
The opensite source without the mobile. prefix
签名密钥 (channel_secret) ✱
The joint-login JWT signing key; stored encrypted, never shown in plaintext after submission
welfare_3pp
Optional payment code, if any
After submission the channel enters 待验证 (Pending) status; once the platform verifies the credentials it becomes 已验证 (Validated) and can be assigned (this prevents wrong credentials from misattributing orders).
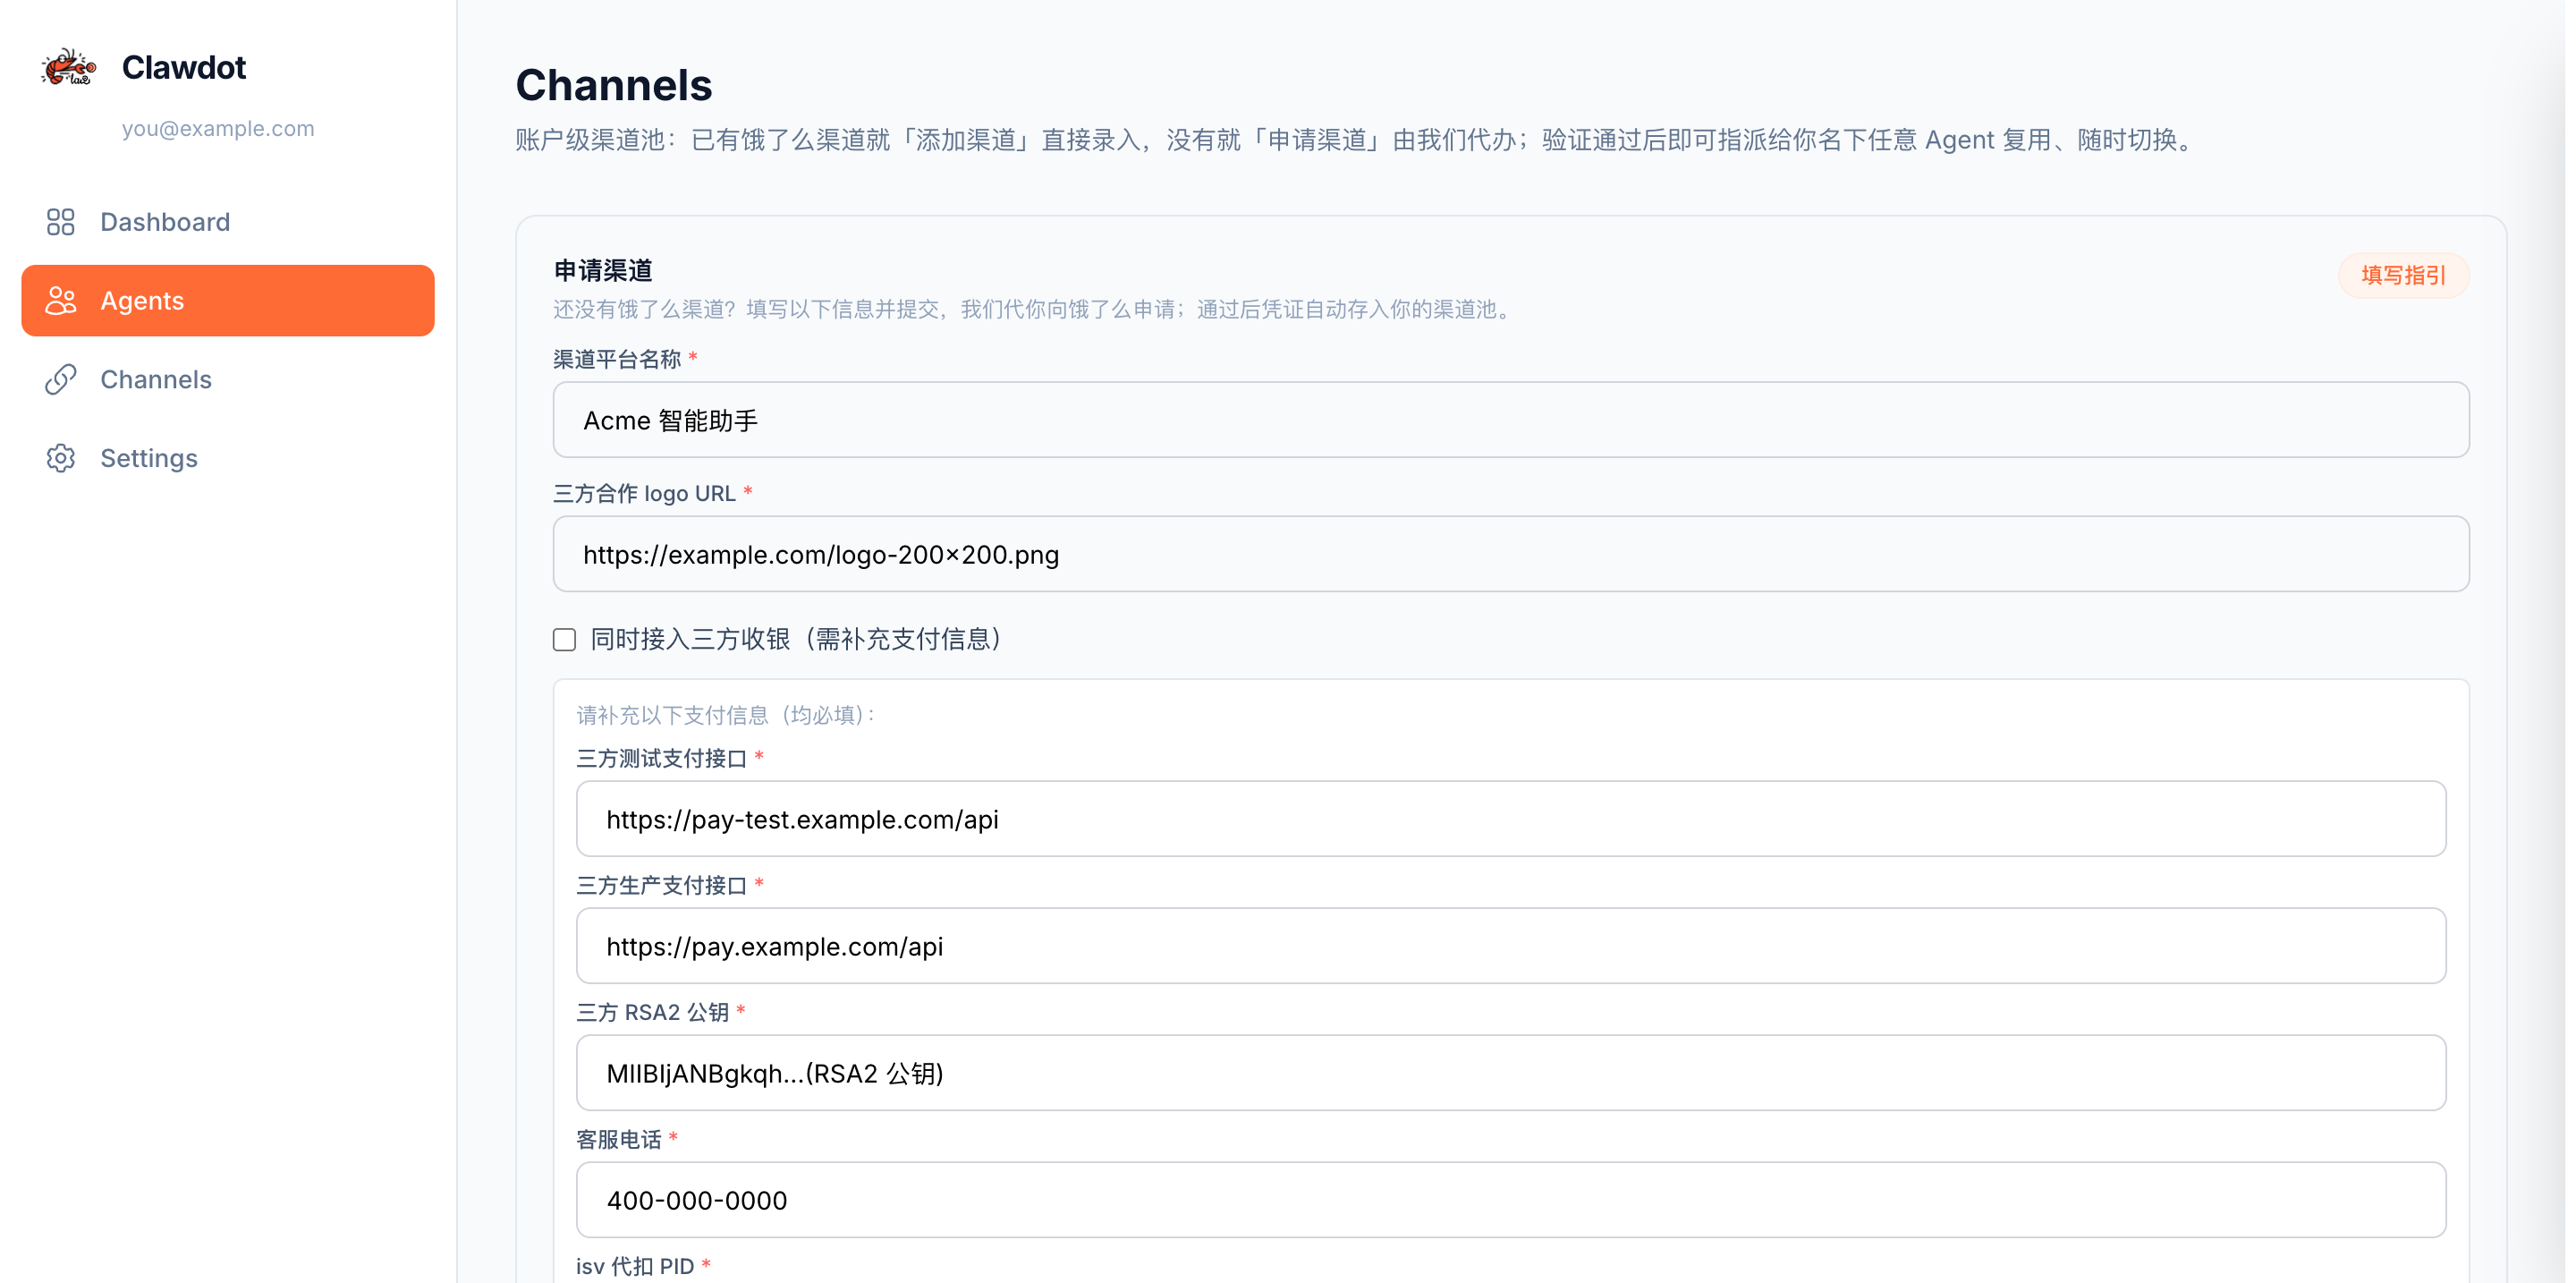
Without an Ele.me channel, click 申请渠道 (Apply) and the platform applies to Ele.me on your behalf:
1
Fill in basic info
Enter the 渠道平台名称 (channel platform name) and 三方合作 logo URL (partner logo shown to users, 200×200 px recommended).
2
(Optional) enable third-party cashier
To integrate a third-party cashier, check 同时接入三方收银 (also integrate third-party cashier) and fill in the six payment fields that appear (test/prod payment endpoints, RSA2 public key, service phone, isv withhold PID / account).
Attachment fields expanded after checking third-party cashier
3
Not sure how to fill it in? Open the guide
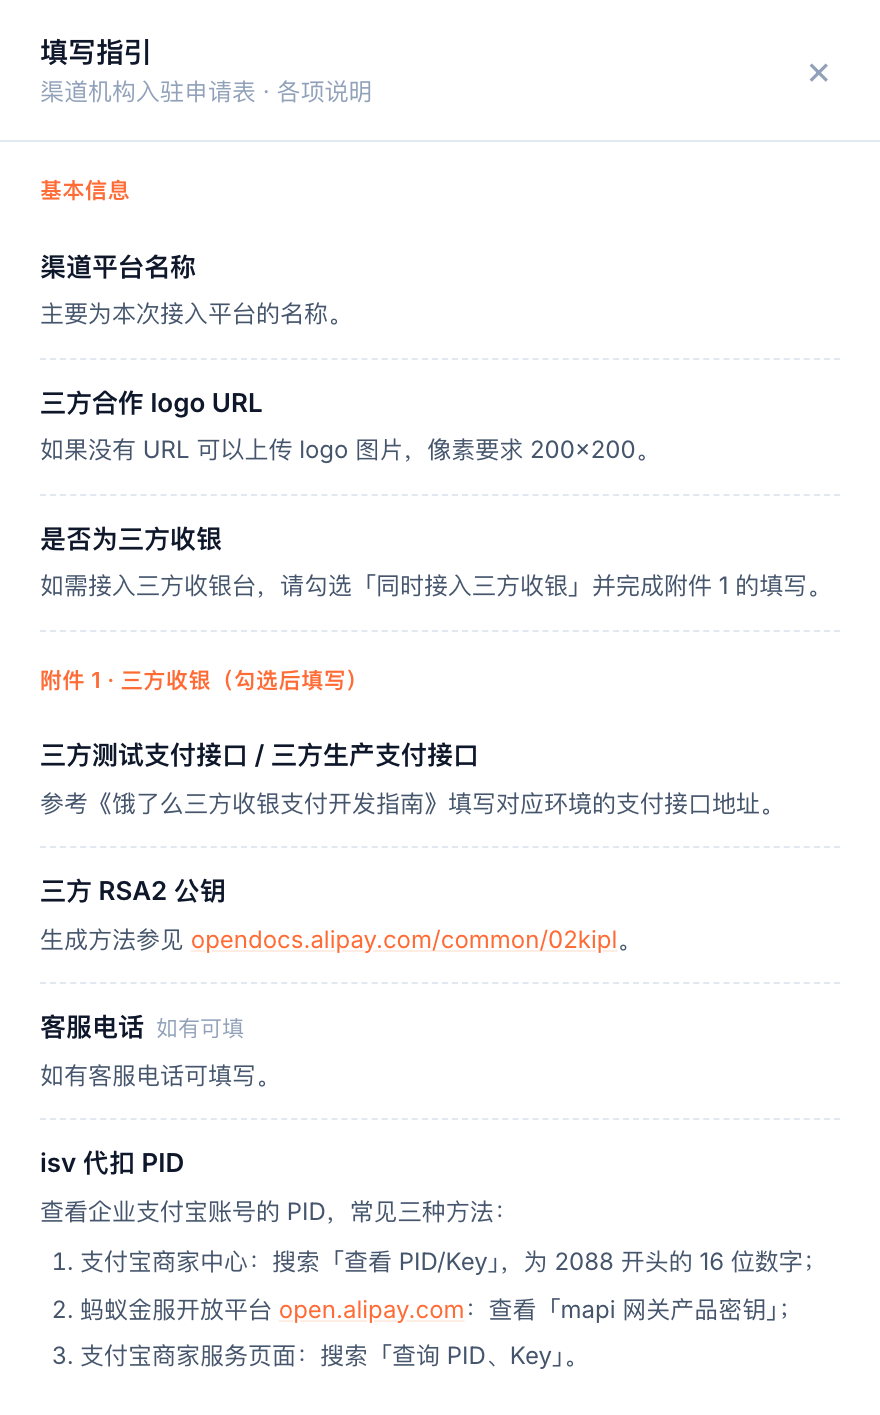
Click 填写指引 (Filling guide) in the top-right of the form; the drawer on the right explains each field (including how to generate the RSA2 public key and look up the Alipay PID).
Filling-guide drawer: per-field explanations
4
Submit and track progress
Click 提交申请 (Submit). The 申请记录 (Application records) section below tracks progress: 处理中 (Processing), 已通过 (Approved — credentials are added to the pool above, ready to assign), 未通过 (Rejected — shows the reason; fix and re-apply).
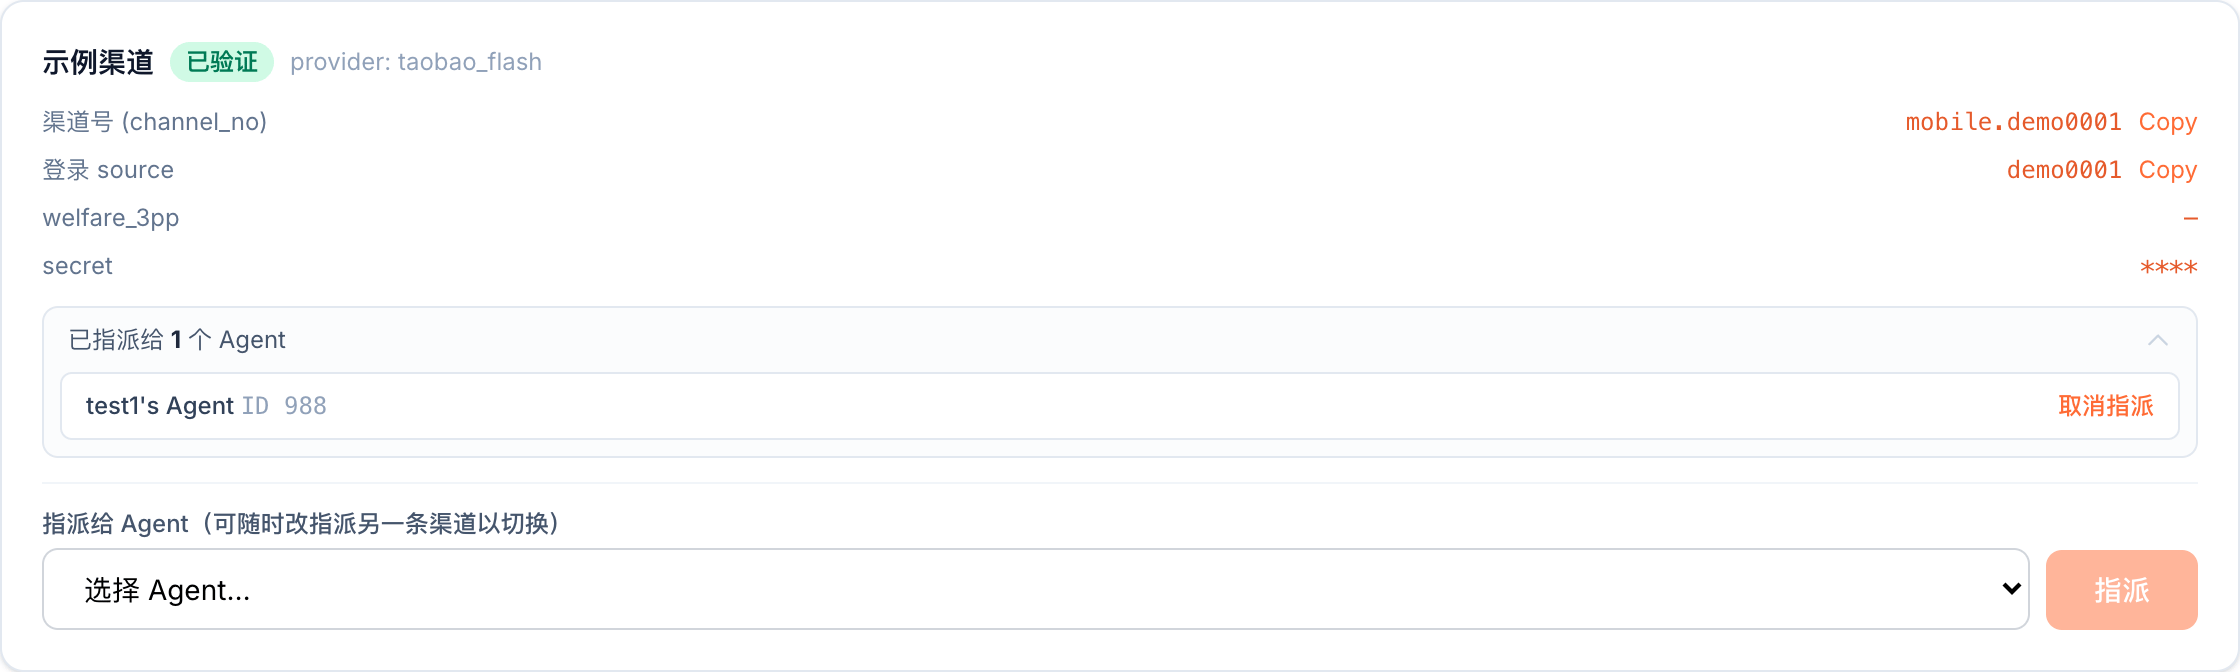
Each channel in the pool is shown as a card: a status badge (待验证 Pending / 已验证 Validated / 已停用 Disabled), and copyable channel_no and login source. The secret is always masked and never shown in plaintext for security. A validated channel has an “assign to Agent” dropdown at the bottom — pick an Agent and click 指派 (Assign). An assigned Agent can be unassigned anytime (falling back to the platform default channel).
A validated channel card, with status badge, fields, and assignment area
Click Request Upgrade on a tier card above your current tier (you can only apply upward).
2
Fill in the request
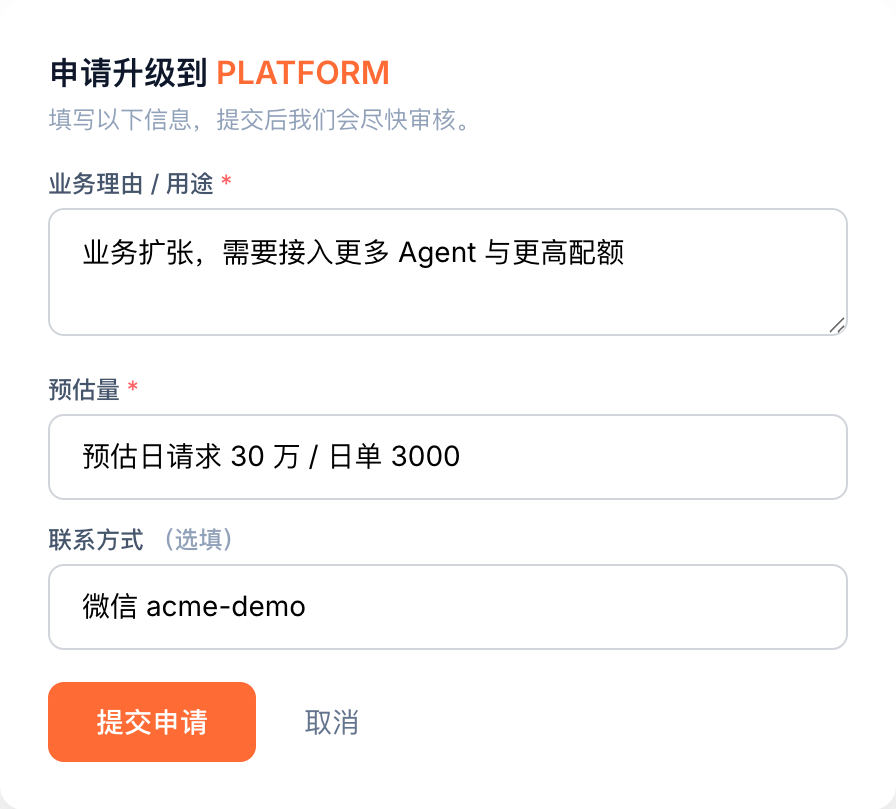
Enter your 业务理由 / 用途 (business reason / use case, required), 预估量 (expected volume, required, e.g. “~300K daily requests / 3000 daily orders”), and contact (optional, for follow-up), then click 提交申请 (Submit).
Upgrade request dialog
3
Wait for review
Only one request can be processing at a time. The 申请历史 (Application history) below shows each request’s status; once approved, your plan takes effect automatically.
No worries. Find the Agent on the Agents page and click the copy button next to its key prefix to copy the full API Key — no Rotate needed. Use Rotate Key only when you deliberately want to replace the key (it invalidates the old one immediately, so prepare your service switch first).
I lost the Consent Grant ID. What now?
Re-run the Bind User flow for that phone number to get a new credential; the old one is invalidated, so update it in your service.
Why can't I see the Channels feature?
Dedicated channels are only available on SUPERAGENT / PLATFORM plans. Request an upgrade in Settings → Plan.
Why can't I assign a channel right after adding it?
A newly entered channel must be verified by the platform (待验证 Pending → 已验证 Validated) before it can be assigned, to prevent wrong credentials from misattributing orders.
What if I'm running out of quota?
When the Dashboard progress bar nears red, request a plan upgrade in Settings ahead of time to avoid being throttled after hitting the cap.